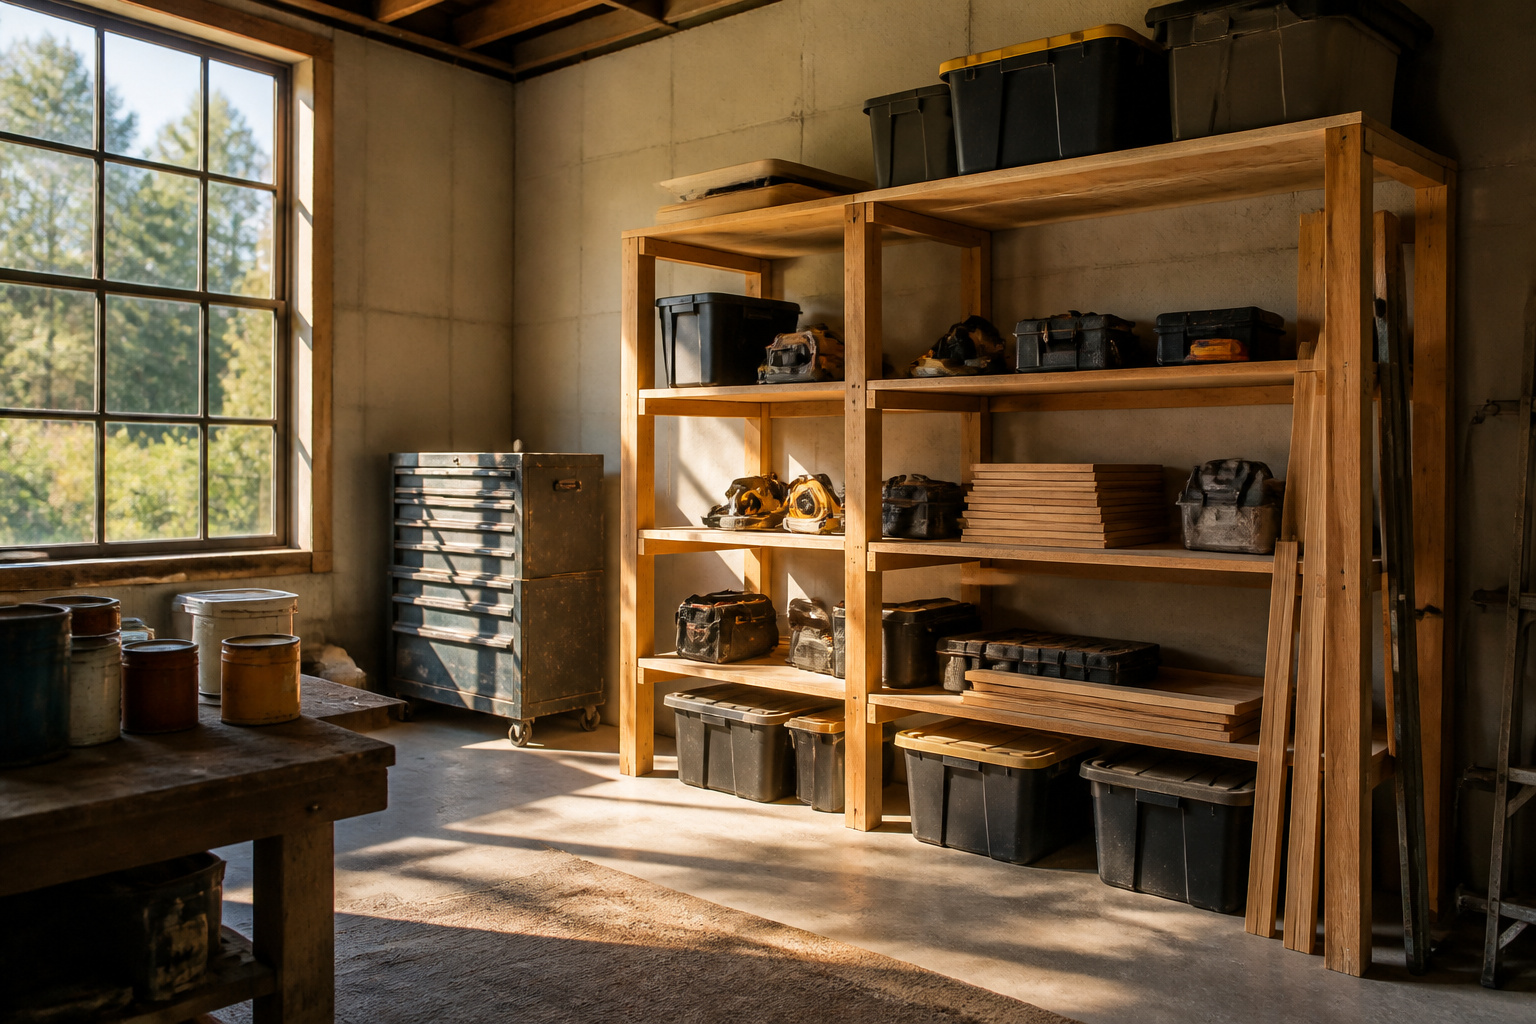
DIY garage storage solutions run from a $15 PVC pipe rack to a $250 cabinet build, and the deciding factor is whether you still park a car in there. The projects that survive real use are the ones planned around what breaks them: stud spacing, caster ratings, and the sun bleaching your bin labels through a south-facing window. A 3/4-inch plywood shelf stays flat where half-inch droops after one loaded winter, and that difference in material thickness is the kind of detail that separates storage you build once from storage you rebuild.
1. Bike Wall Mounts
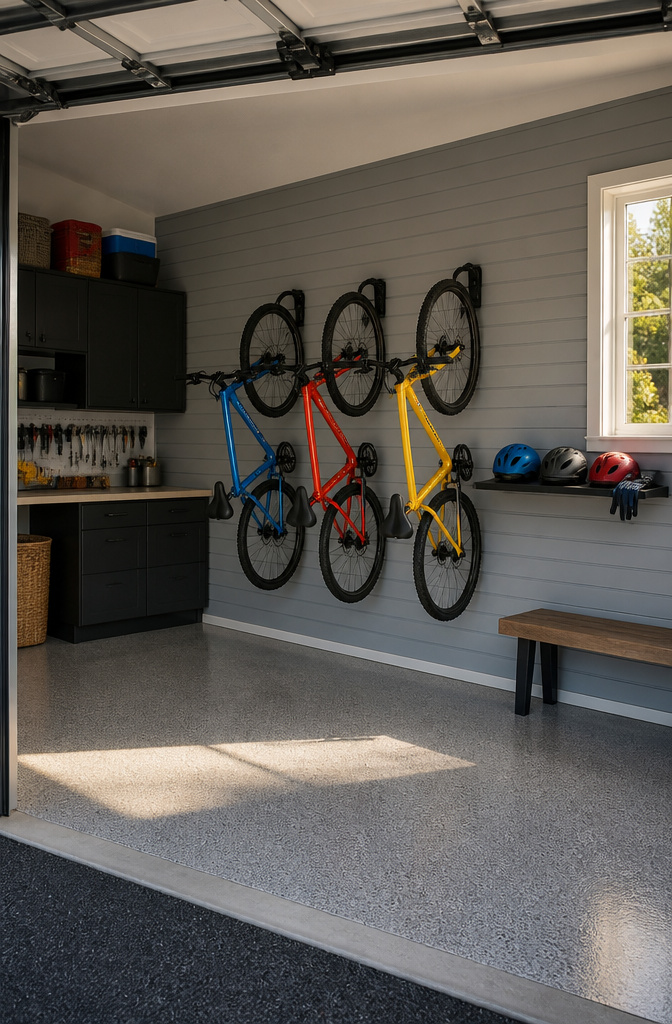
Vertical bike hooks turn a wall into parking for two, three, or four bikes without eating a single square foot of floor. The basic hardware is a rubber-coated hook screwed into a wall stud; the stud part matters, because drywall alone will pull out under the weight. For households with multiple bikes, spacing hooks about 12–16 inches apart keeps handlebars from tangling, and staggering high and low positions lets you nest adult and kids’ bikes closer together than a straight line allows.
The floor space freed is the real payoff. A bike lying flat or leaning in a corner claims roughly 6–7 feet of length and a couple feet of depth you could otherwise use for a workbench or storage bins. Wall mounting returns all of it. Some hook systems, like the Saris Cycle Glide, add glides that let you slide bikes sideways along the wall, packing them tighter when you need clearance and spreading them for access. A small shelf nearby for helmets and gloves keeps the rest of the gear from drifting back onto the floor.
2. Wall-Mounted Shelves
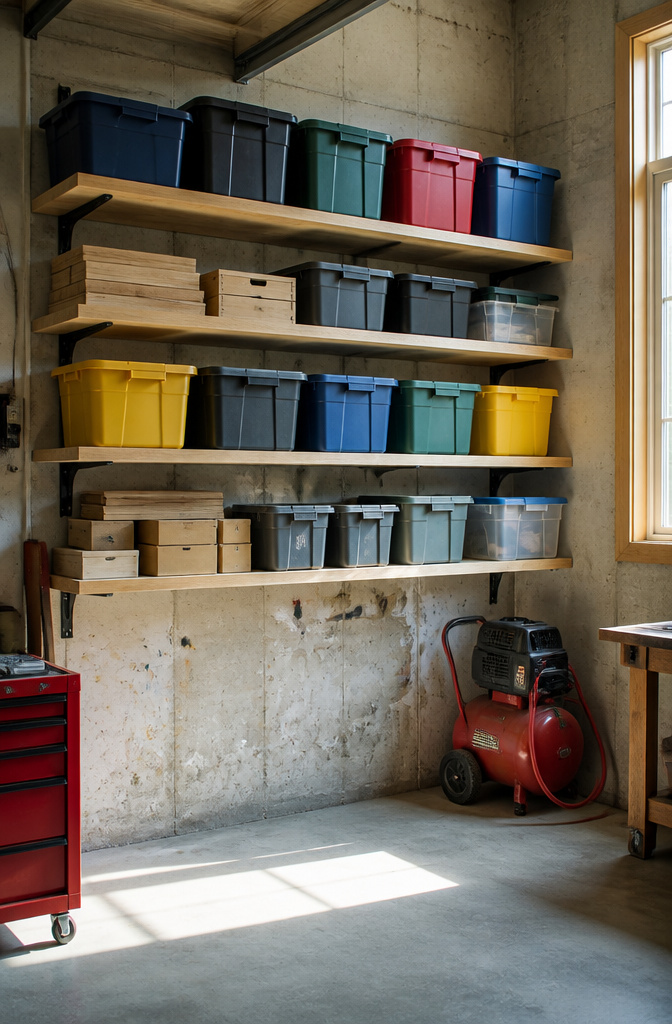
Wall-mounted shelves are the fastest way to get boxes off the garage floor, and the depth matters more than most people plan for. Sixteen inches is the minimum that actually swallows a standard Rubbermaid bin without the lid hanging over the front edge. Anything shallower and you are stacking bins two deep or watching them teeter on the lip.
Stud spacing is the part that keeps the shelf on the wall. Standard studs run 16 inches on center, so a shelf eight feet long hits seven studs if you land on the first one right. That is worth checking with a stud finder before you cut anything, because the drywall seam is not always where the stud is.
I learned the sag lesson with half-inch plywood once. It held at first, but after a winter of loaded bins the front edge drooped enough that the bins started sliding forward. Three-quarter-inch plywood costs more and weighs more, yet it stays flat under the same load. For a weekend project with bins in mind, that thicker shelf is the one I would build now.
3. Magnetic Tool Rack
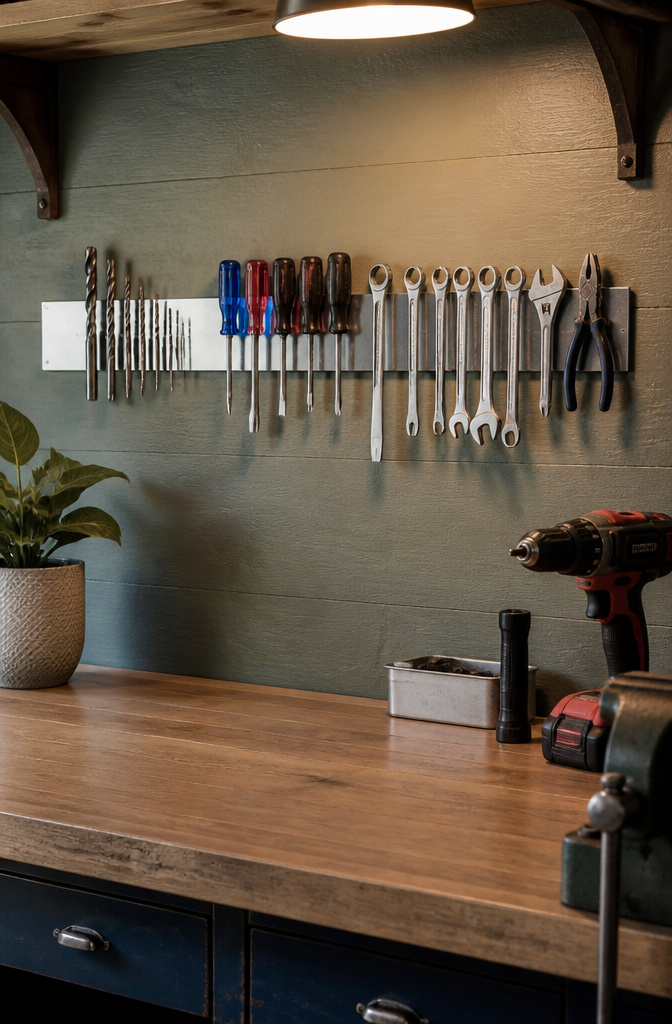
A strip magnet rated for heavy-duty use will hold drill bits, screwdrivers, and wrenches close enough to grab without opening a drawer. Sheet metal backing spreads the field wider but adds weight and cost most weekend projects do not need.
I tested this on my own wall after a socket set kept sliding off a weaker kitchen-grade strip. The difference is real: a strip built for garage loads grips a full wrench set without sagging, while the lighter ones drop anything over a few ounces.
Hammers and files look like they belong on a magnet board, and sources often list them together. They fall. The head shape on a claw hammer does not seat flat, and files have too little surface contact. Plan a hook or a shelf for those, and stop expecting the magnet to do work it was never meant for.
4. Rolling Workbench
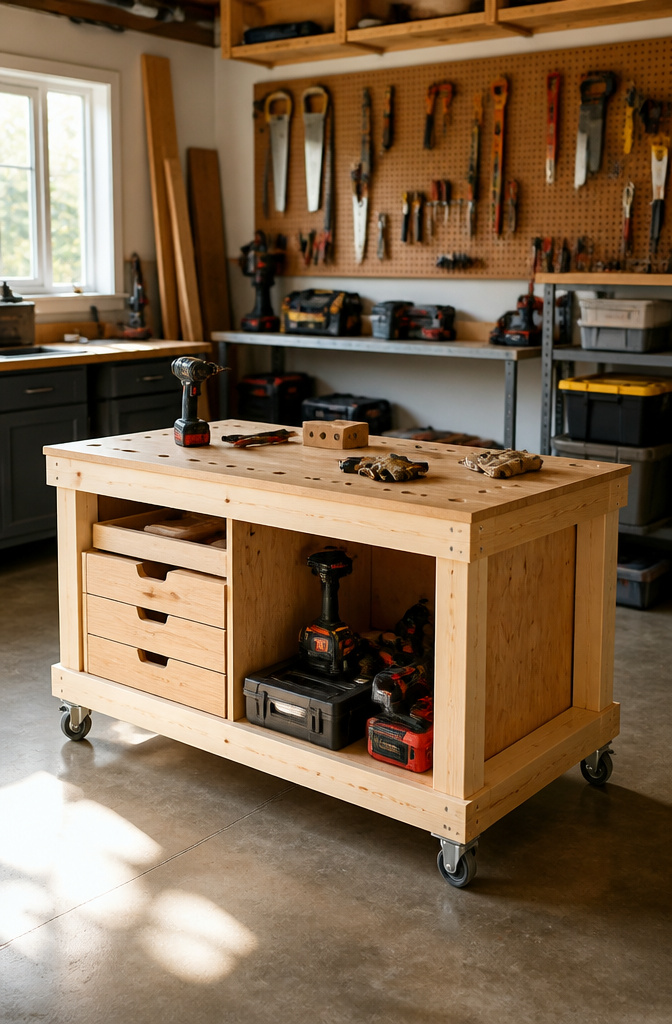
A rolling workbench built from 2x4s and plywood turns a garage that still parks cars into something you can actually work in, then roll back against the wall when the weekend ends. The casters matter more than most people expect: standard hardware-store wheels rated for 200 lb each feel fine in the aisle, but load the bench with a project and a vise and they flatten out or seize on grit. Look for casters rated at least 300 lb each, and check that the rating is per wheel, not the set of four. Drawer depth is where I see the most wasted space. Six-inch drawers swallow socket sets and chisels whole; anything shallower leaves your hand planes or cordless drill sitting on top, defeating the point. The real headache I ran into was the locking casters on an epoxy floor. The rubber pads grip concrete just fine, but on a sealed, glossy surface they skate sideways the moment you lean into a cut. A workbench that drifts while you are trying to clamp something is worse than no workbench at all. A strip of nonslip mat under the wheels, or switching to casters with a threaded stem and a separate floor lock rather than a pedal brake, solves it without much extra cost.
5. Overhead Storage Rack
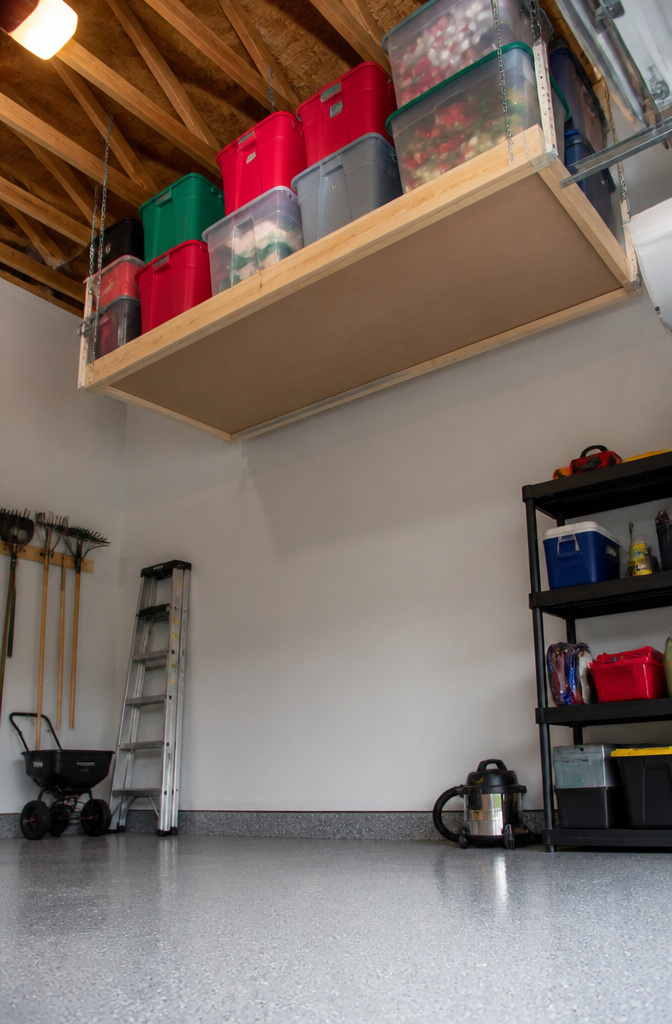
Ceiling-mounted racks turn the gap above a garage door into storage for holiday bins and gear you touch once a year. The builds I looked at use two-by-fours and either three-quarter-inch or half-inch plywood screwed to ceiling joists, with wooden flanges that let plastic totes slide on and off. Leave clearance for the garage door track; the rail and its hardware need uninterrupted space to run, and a tote hanging too low will bind or dent.
Joist spacing matters more than the plywood thickness. Standard joists run 16 inches on center, but some garages are framed at 24 inches. A rack spanning the wider gap needs beefier lumber or shorter runs, or the shelf will sag under load. I would not store anything up there that I might need on short notice; a ladder, a plan, and a Saturday morning disappear fast when you are fishing down the bin that holds the thing you suddenly need. Label the bottom of each tote so the contents are readable from below. That small step saves the guesswork later.
6. Pegboard Wall
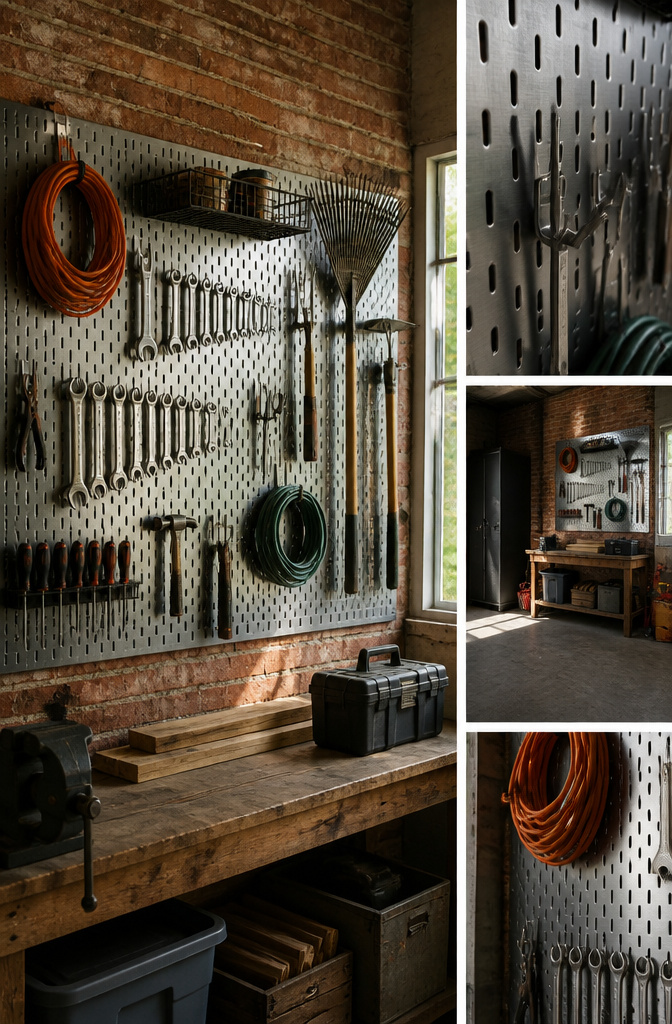
Pegboard walls need a gap behind them or the hooks won’t seat. The standard way to build that gap is to run 1×3 strips horizontally at the top and bottom of the panel, and again every 16 inches or 24 inches across the middle to match your wall studs. Use 1/4-inch pegboard and attach it with washer-head screws that bite into the strips without tearing through the face.
The hook spacing on 1/4-inch pegboard is standardized, so the cheap packs of L-hooks and J-hooks from any hardware store fit. What they don’t always do is stay put. The lighter hooks work fine for rakes and extension cords, but anything with real weight slowly walks itself out of the hole when you lift the tool off. Locking peg hooks with a small spring tab or a bent leg behind the board solve this; they cost more per piece but you buy them once.
Fiberboard pegboard, the kind most home centers stock, swells at the edges in a damp garage. I watched a panel I mounted bow outward and loosen its screws over two humid summers, which is why I switched to metal. Metal pegboard comes in 16-inch and 24-inch widths with built-in edge flanges that act as standoffs, so you skip the 1×3 strips entirely. It costs more upfront and you need to order it, but the panels are rigid enough to hang a bike off the bottom flange with a screw-on hook.
7. PVC Pipe Tool Storage
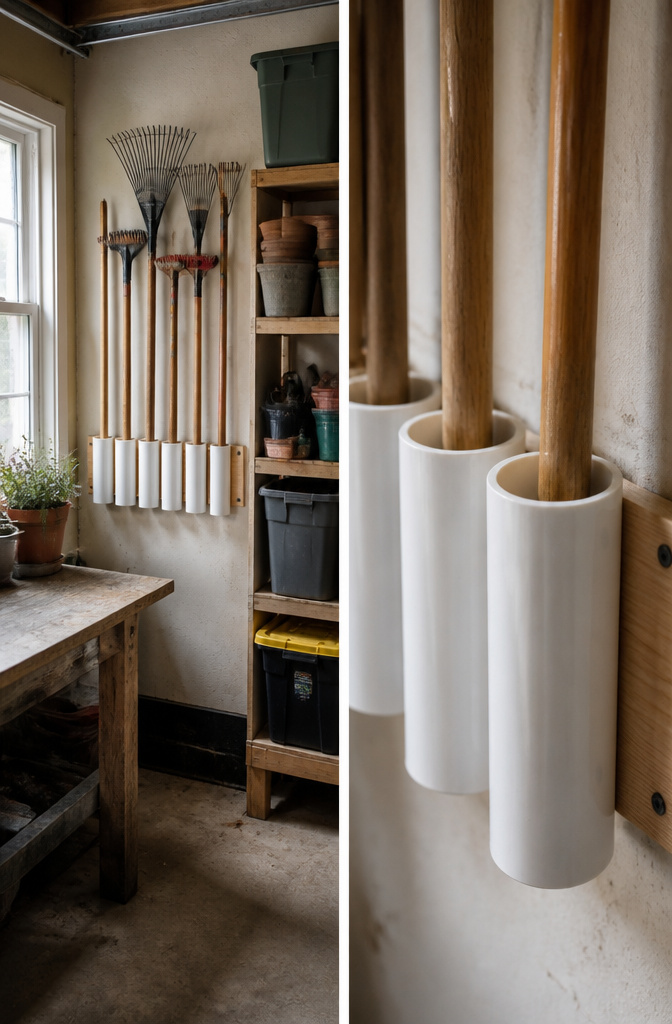
A 3-inch diameter PVC pipe fits a standard rake or hoe handle with room to spare, but a shovel handle needs at least 4 inches or it jams on the shoulder. I cut my first set all at 10 inches long, mounted them to a 1-by-6 board, and screwed the whole thing to the studs at a height where the tool heads clear the floor. The mistake was spacing. I put the pipes 6 inches apart center-to-center, which works on paper but leaves no wiggle room for the tool heads when you pull one out. Eight inches is the minimum spacing that keeps you from knocking the neighbor loose every time you grab a rake.
The heat-gun trick came later, after I got tired of handles catching on the raw cut edge. A few seconds of heat on the pipe end, then a quick roll against the workbench, flares the mouth just enough for a clean slide. It is not pretty, but it saves the aggravation. The whole setup cost me the price of a 10-foot PVC stick and a handful of screws, maybe $15 if you are buying new pipe instead of using what is already in the corner of the garage.
8. DIY Cabinets
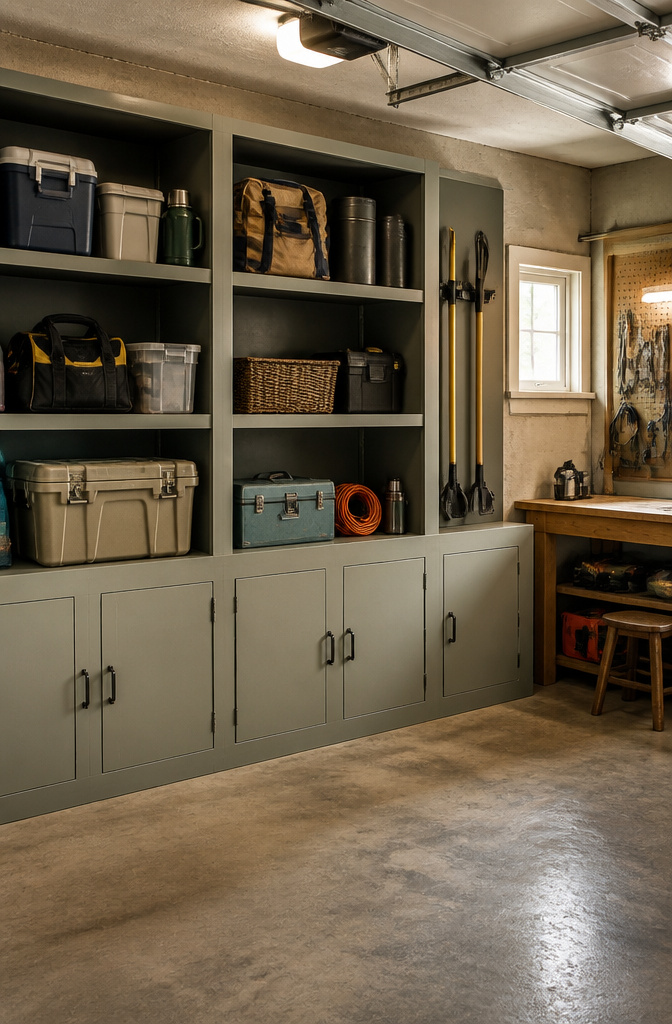
Building cabinets in place skips the headache of keeping a box square while you wrestle it through a garage door. A 2×2 frame screwed to the wall and ceiling carries the load, and plywood panels skin the top, bottom, and sides right where they stand. The frame tolerates a little racking that would bind a fussier door, so ordinary butt hinges work fine without the special hardware that cabinet-grade boxes demand.
The passages put materials at about $250 for a large unit, or roughly $27 per linear foot for an 8-foot run using melamine and pine 1x4s. Plywood cost more than MDF when I priced it, but the gap closed once I factored in a finish. MDF swells at any damp concrete contact, and garages get damp. Raising the cabinet base even an inch off the floor buys insurance, yet plywood needs less of it. That math pushed me up a grade.
You don’t have to be a cabinetmaker to build big, sturdy cabinets, especially if you build them in place.
What that means: the skill barrier is lower than it looks, and the savings against pre-assembled shelving are real. Masking tape on the wall and floor lets you map the run before cutting, and each cabinet needs at least one stud behind it for a solid anchor. Plan for that, and the rest follows.
9. Storage Bins
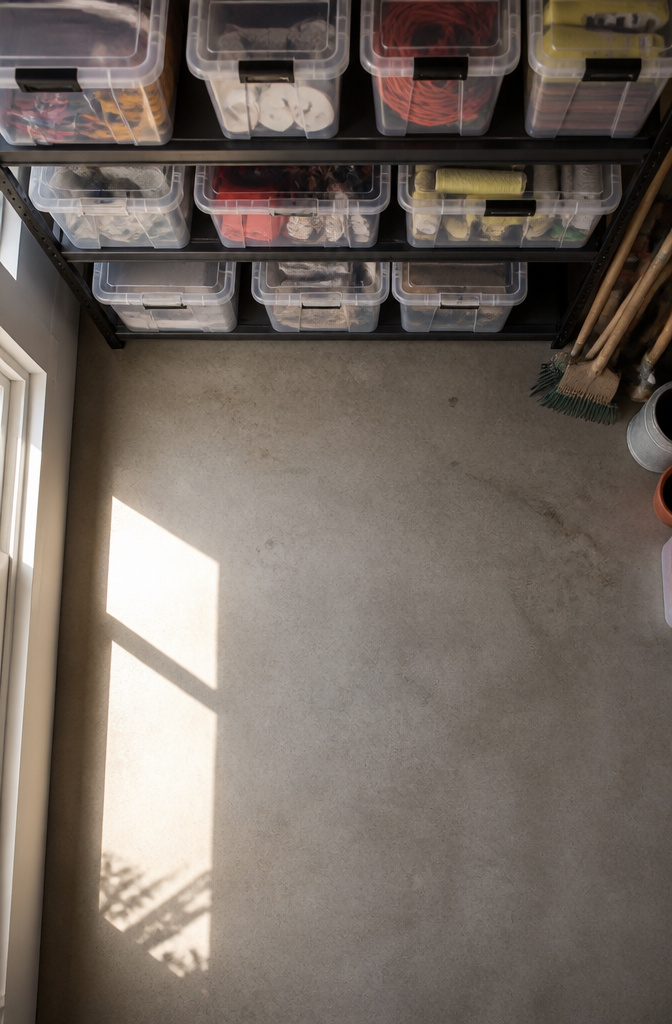
Clear plastic bins earn their keep in a garage because you can see the contents without unstacking four layers to discover you grabbed Christmas lights instead of camping gear. The ones that fit standard 12-inch-deep wire shelving are usually labeled 6 or 8 quarts; anything deeper and the lip overhangs, which wastes space and catches every time you slide it out. Labels printed on a thermal label maker smudge within a season out there, so switched to a Brother P-Touch with laminated tape, which has held up three years now. Stacking works until about four high on the 27-gallon size; the fifth lid starts to dish inward, and then the next stack sits crooked and the whole tower wobbles when you pull from the middle. I stopped buying black bins entirely after one August afternoon of unloading every single one onto the driveway to find a specific sprinkler part. The heat in a closed garage softens plastic enough that a bowed lid from overstacking will permanently deform by fall, so the limit is really three high if the top gets any sun through a window.
10. Ladder Storage
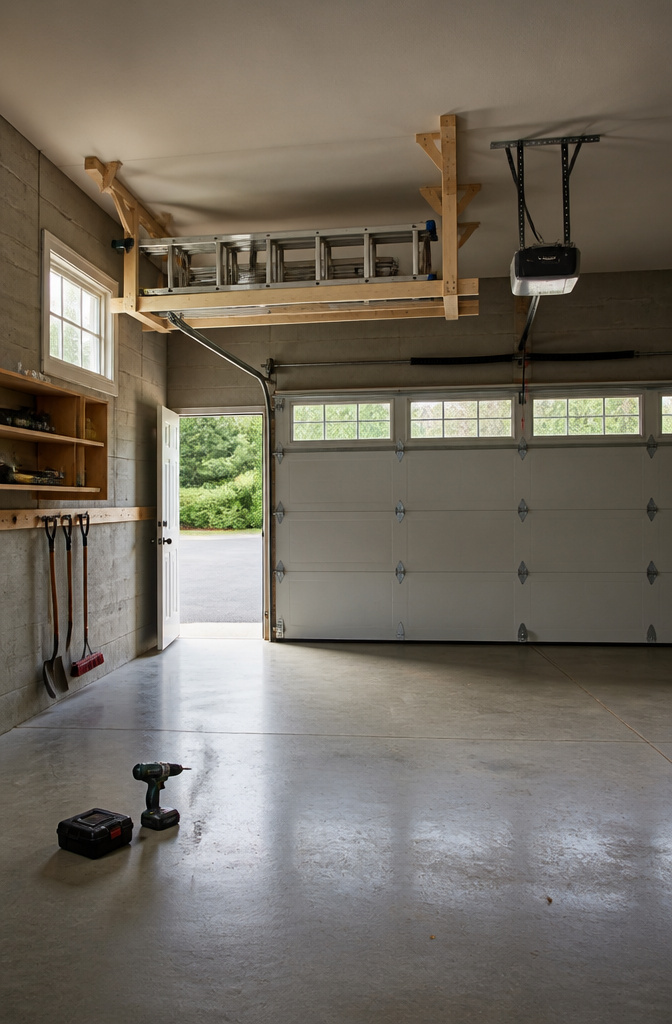
Ladders eat wall space the way extension ladders eat everything: twelve feet of rail that has to land somewhere. For an extension ladder, ceiling racks built from scrap 2x4s screwed into joists with two 3-1/2-in. screws at each joint keep it flat, out of the swing radius, and easy to slide out when gutters clog in November. Position those racks clear of the garage door track, or you’ll remember why every time the opener stutters.
Step ladders flip the problem. Their A-frame wants to pivot on a single hook like a pendulum, so wall mounting needs paired hooks spaced to catch both rails and keep the thing from drifting into your car door. I learned that spacing by walking into one that had slowly rotated forty degrees over a summer.
Wall hooks run out fast in a one-car garage. The ceiling option solves that by stealing back the void above the garage door, where no rack or bin can live anyway. Same 2×4 construction, same screw pattern, just hung parallel to the joists instead of across them. The ladder becomes long-term storage that happens to move twice a year, not a daily obstacle.
Rolling Storage for Under Stairs
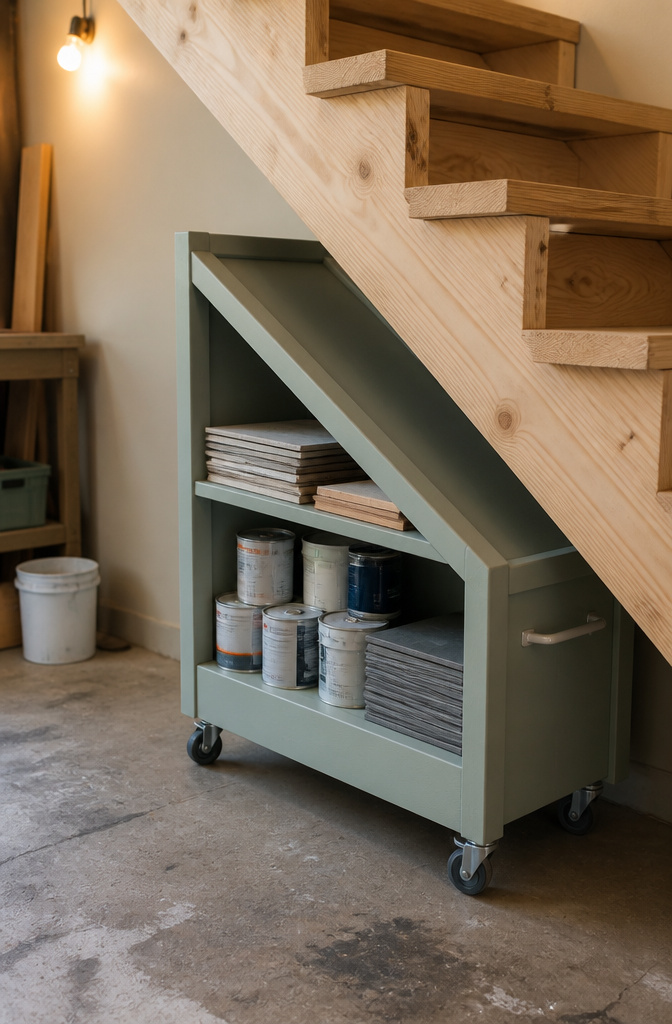
The space under garage stairs sits at an awkward angle, which is exactly why it stays empty while clutter piles up everywhere else. A rolling cart changes that math. Build the frame from plywood and scrap lumber, then mount it on casters rated for the weight you actually store. For uneven garage floors, rigid casters with a polyurethane wheel outperform swivel casters; the fixed orientation tracks straight and the polyurethane won’t flat-spot under a load of paint cans or tile supplies left sitting for months.
Width is where most builds fail. Measure the stair angle at its narrowest point, then subtract an inch for clearance and the plywood thickness on both sides. My cart ended up a few inches narrower than the opening, which felt wasteful until I realized I could roll it out without shimmying.
What goes on it matters as much as the build. Tile supplies, seasonal tools, and the paint stash I only touch every two years live there now. The trick is keeping the top shelf low enough that I can see what’s actually on the cart when I roll it partway out. If I have to crawl under the stairs to check, I won’t check, and the whole point of the project collapses.
Repurposed Kitchen Cabinets and Pallets

Old kitchen cabinets show up on the curb after remodels, or you spot a stack at a Habitat ReStore for a fraction of new melamine. The ones worth hauling home still have solid boxes; press the toe-kick and the underside of the sink base for soft particleboard, since water damage there spreads fast and the cabinet will sag on garage concrete even faster. A coat of damp-proof paint buys you time against garage humidity, though it does not turn cheap pressboard into marine plywood.
Pallets run free behind most big-box stores, but disassembling them without splitting the slats takes a pry bar and a claw hammer, plus patience most weekend projects do not budget for. The time math flips around the two-hour mark: if you are still wrestling rusty nails for slats that will need planing, you have crossed into hourly savings that no longer exist. Store-bought pine 1x4s at about $27 per linear foot for an eight-foot unit start looking like the smarter money, especially if you need the storage done before the weekend ends.
Color-Coded Bin System
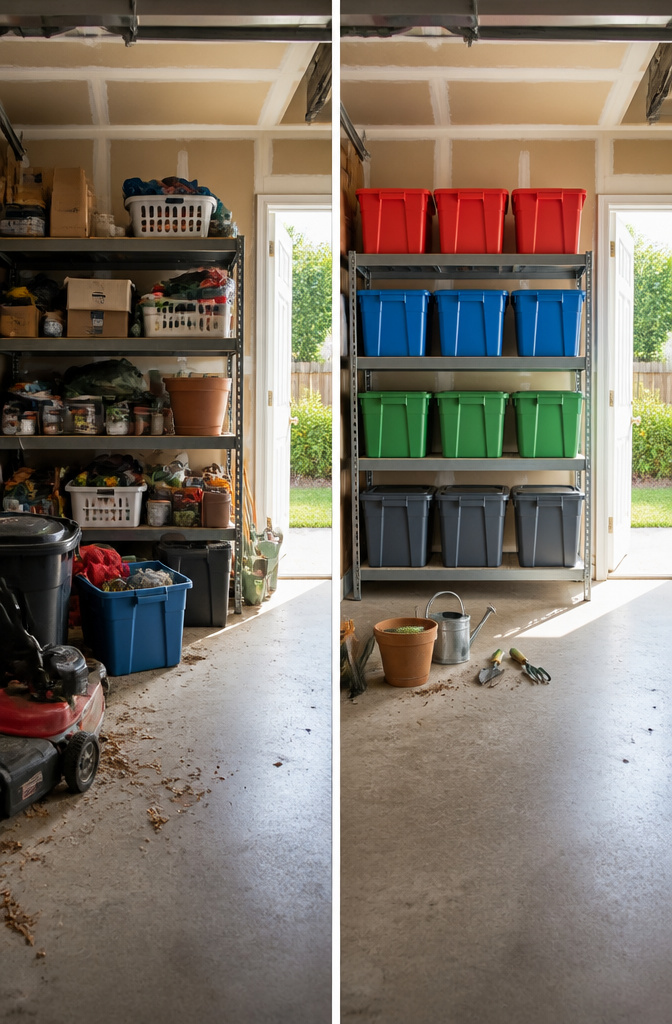
A color-coded bin system only works if the colors still mean something six months later. I learned that after picking six shades for a garage redo: red for holiday decor, blue for sports gear, green for gardening, yellow for automotive, orange for tools, and purple for camping. Within a month, purple and orange had become interchangeable junk bins, and the whole system started sliding.
Three to four colors is the practical ceiling for a garage that gets real use. Fewer, and you end up with overstuffed categories; more, and your brain stops filing correctly. I settled on red for seasonal, blue for active hobbies, green for yard work, and gray for hardware. That fourth color, gray, became the catch-all that keeps the other three honest.
The bigger problem came from the window above the garage door. South-facing glass faded my first set of labels to pastels within one summer. Paper labels under clear tape lasted about eight weeks before they bleached to white. What held up was adhesive vinyl cut with a Cricut Explore, the same material one maker reported stayed firmly in place for years. For bins themselves, solid opaque plastic holds color far longer than the tinted clear versions that look sharp in the store but chalk out in sunlight. If your garage gets direct sun, budget for replacement labels every two to three years regardless of material, or store the most-used bins on the shaded wall and let the fading hit the holiday stuff you touch twice a year.
Frequently Asked Questions
What are some easy DIY garage storage ideas?
Wall-mounted shelves, pegboard walls, and rolling workbenches or carts are straightforward projects that most homeowners can tackle in a weekend. Wall shelves get boxes off the floor, pegboard keeps tools visible and reachable, and anything on casters can roll out of the way when you need the space back. The article covers each of these with specific material choices and spacing rules that keep the build simple.
How can I organize my garage tools?
A magnetic tool rack for drill bits, screwdrivers, and wrenches keeps them grab-ready without opening drawers; just skip the kitchen-grade strips and get one rated for heavy-duty loads. Pegboard with locking hooks handles rakes, extension cords, and lighter hand tools without the hooks walking out of the holes. For hammers and files, plan a hook or shelf instead, since their shapes do not seat flat on a magnet.
What materials do I need for DIY garage storage?
Plywood is the workhorse: three-quarter-inch for shelves that stay flat under loaded bins, half-inch for lighter jobs. PVC pipe and a 1-by-6 board make cheap tool holders for long-handled yard gear. Pegboard comes in fiberboard, which swells in damp garages, or metal, which skips the standoff strips entirely. Casters, 2x4s, and melamine or pine 1x4s round out most of the builds described.
How can I maximize vertical space in my garage?
Wall-mounted shelves mounted to studs lift bins and gear off the floor, with sixteen inches of depth as the minimum that actually swallows a standard bin. Ceiling racks above the garage door turn wasted overhead space into storage for holiday decorations and rarely used items, though you need to leave clearance for the door track. Bike wall mounts and ladder ceiling racks also reclaim floor area by parking things vertically.
What is the best way to store seasonal items in the garage?
Overhead storage racks above the garage door or in the ceiling joists keep holiday bins and once-a-year gear out of the way. Label the bottom of each tote so contents are readable from below without climbing. For smaller seasonal items, a color-coded bin system works if you limit yourself to three or four colors; more than that and the system collapses into interchangeable junk bins.