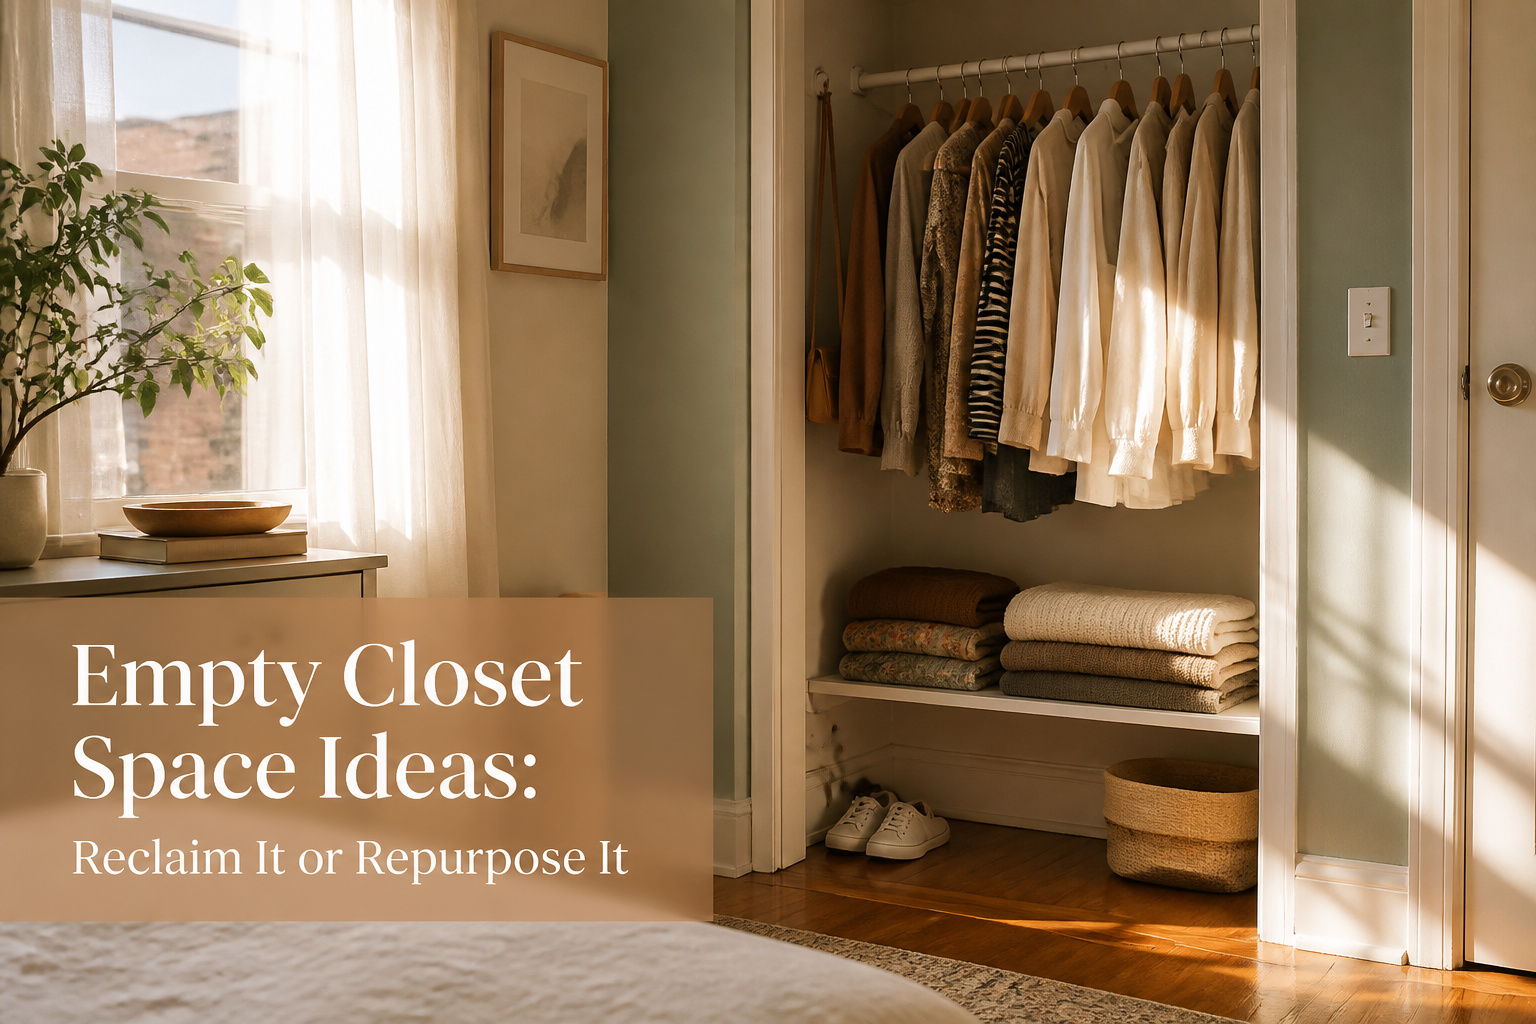
Empty closet space ideas range from a $9 tension rod to a full $400 system, and the right call depends on whether you own the wall behind it or just the air in front. Renters who drill without checking their lease terms lose more in deposit deductions than they save in storage gains. A basic IKEA PAX frame starts around $110, but the 22 7/8-inch depth will jam your doors shut if you did not measure front to back before ordering.
Declutter What You Do Not Wear
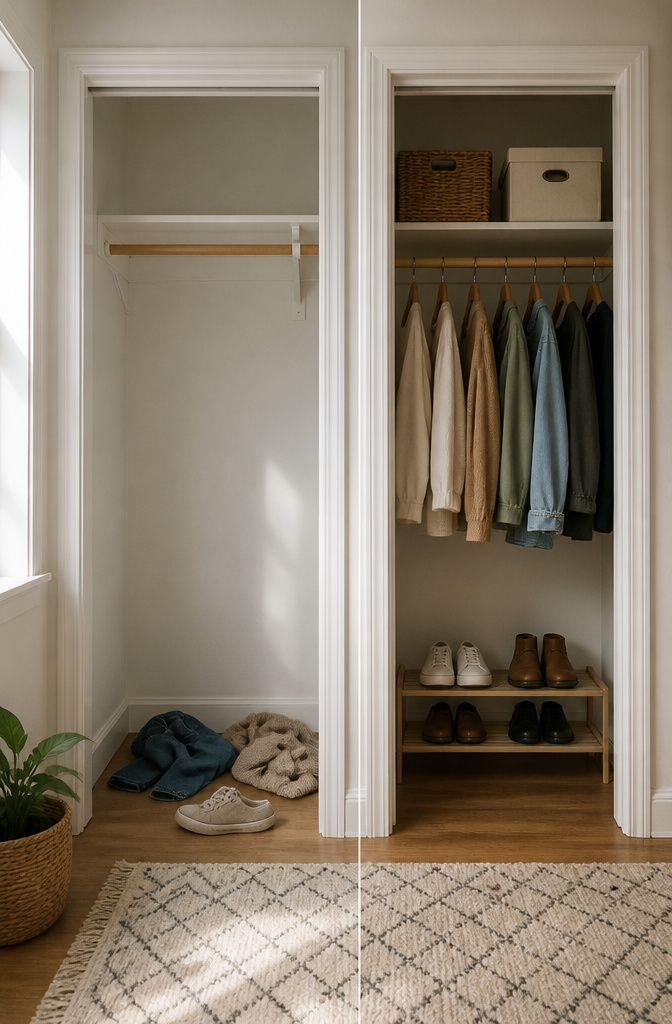
The clothes that actually live in a closet are rarely the ones anyone wears. A year ago I pulled everything out of my own closet, category by category, and the one-year rule turned out to be the only filter I needed. If it had not been worn in twelve months, it went. That single decision opened up about a third of the rod before I bought a single bin or bracket.
Starting with a blank slate, or as close to it as your floor allows, lets you see the real volume. Pants first, then sweaters, then whatever category eats the most hanging space. The pieces that no longer fit the life you have now, the ones that feel fine but never get chosen, they are what make the closet feel full while the outfit you want stays buried. Fewer items means the organization that follows actually holds, because there is less to maintain. The "meh" clothes cost more in morning time than they save in replacement money.
Install a Closet System You Can Take Apart
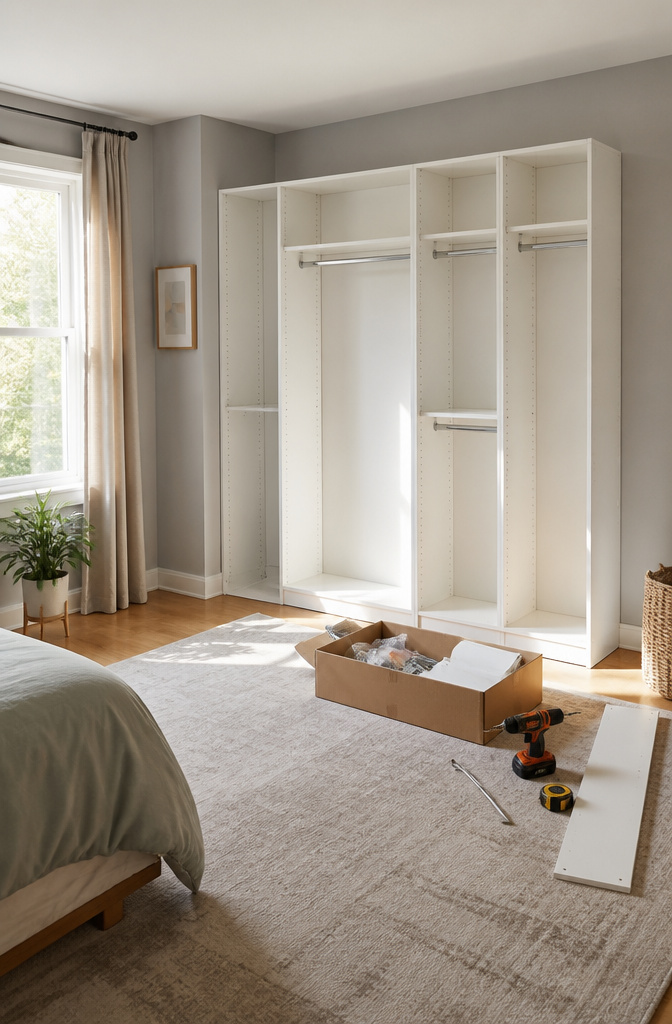
A basic IKEA PAX unit runs about $200–$250 and comes apart with a hex key, which makes it the system I’d point most renters toward first. The frame pieces slot together; you add shelves and rods to match whatever you actually hang. I put one in a spare bedroom closet last spring, measured the back wall with a tape measure, and had the boxes open and frames standing inside two hours. A drill helped for the wall anchor, though the unit stands fine on its own if your ceiling is low enough.
The Container Store’s Elfa costs more, closer to $400 for a comparable reach-in setup, but the wall-mounted standard rails leave smaller holes than PAX’s top brackets and the whole thing lifts off in one piece. EasyClosets sits in between price-wise and ships cut to your dimensions, which sounds convenient until you realize their online tool wants numbers you probably do not have. I measured my own space three times and still cut one shelf short.
What no product page clarifies is how much depth you actually need. My closet was 24 inches front to back, and a PAX frame at 22 inches deep left just enough room for hangers to sit flat. Measure your depth before you order any frame deeper than 20 inches, or the doors will not close.
Add a Second Rail
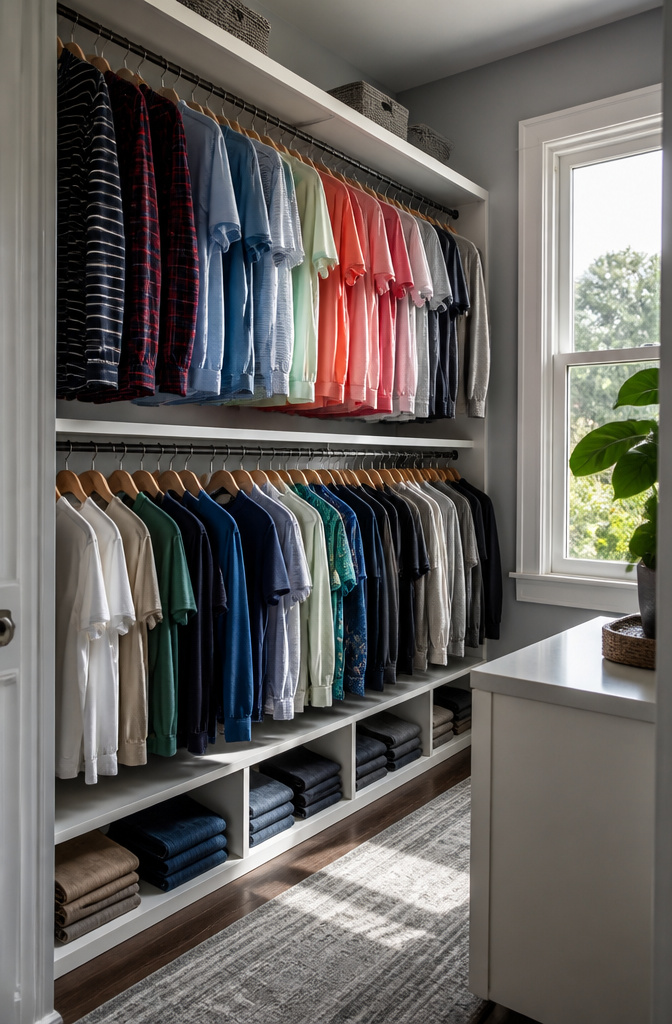
A second rail turns the dead zone under your hanging shirts into active storage. The IKEA ALGOT system, now BOAXEL, was built for this, though an extendable rail from Home Depot or Amazon costs less and does the same job. For renters, a tension rod set at the right height saves your security deposit; owners can mount permanent hardware and forget it.
The height is where I misjudged. I set my first lower rail about 36 inches from the floor, thinking more clearance was better. My shirts draped onto the rail below, and the folded pants I hung brushed the floor. Moving it up to 42 inches fixed both problems, with the hems clearing the lower bar by a clean three or four inches. Skirts need less, so the same 42 inches leaves them floating well clear.
In a shared closet, the lower rail puts a kid’s wardrobe at kid height without a custom install. That was the unexpected win in our house: the upper rail holds out-of-season and parent clothes, the lower one holds what gets grabbed daily.
Create Zones by How You Dress
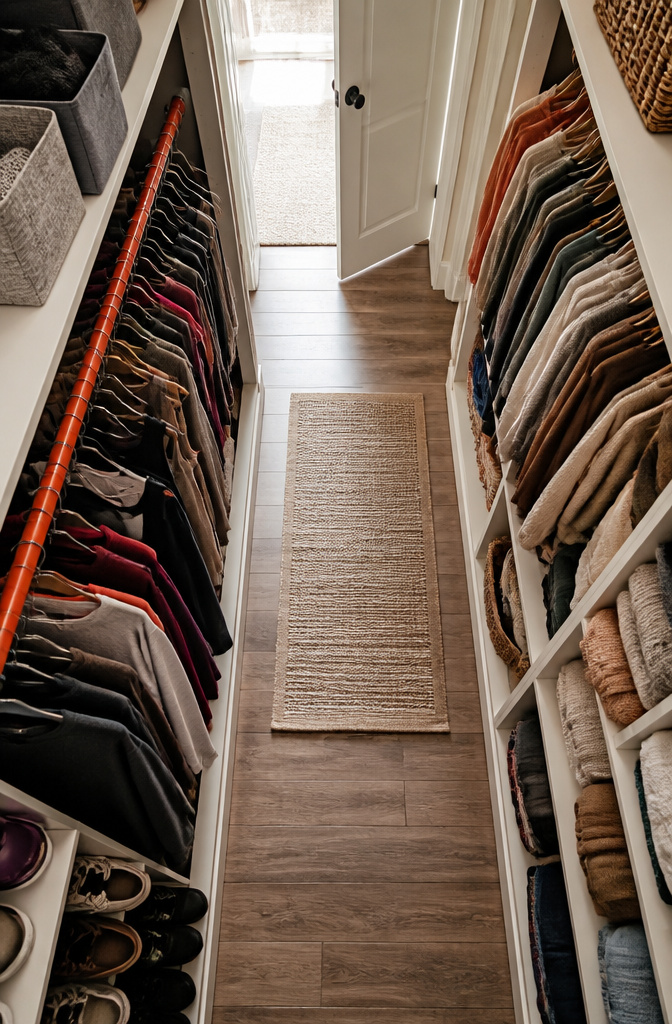
Work clothes used to live on the left side of my closet and everything else on the right, which worked fine until I took a job with no dress code. Suddenly the old split made no sense; I was reaching past blazers I never wore to find the same three sweaters. Redrawing the zones by activity instead of formality fixed the morning slowdown. Exercise gear now sits closest to the door, work-from-home clothes occupy the middle rod, and weekend pieces fill the back wall. Seasonal coats compress into the upper shelf in labeled bins so they do not steal rod space from what I actually touch this week. The redraw took about an hour and a roll of painter’s tape to mark boundaries. Zones fail when they are too rigid; leave one section unlabeled for the in-between pieces that show up in every life.
Move Out-of-Season Clothes Under the Bed
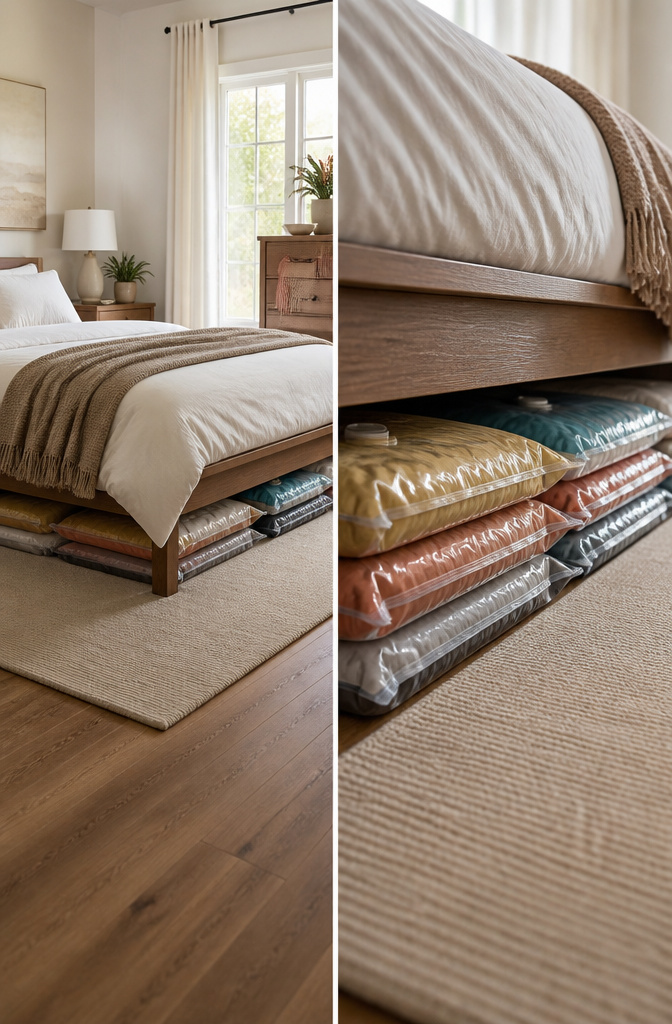
Vacuum bags flatten bulky winter coats or summer dresses to a slab that slides under most bed frames without risers. A standard frame leaves roughly six to seven inches of clearance, which is enough for a filled bag but not for a rigid bin. Low-profile fabric bins with reinforced sides work if you need stacking, though they usually need two-inch risers or a platform bed to fit.
I tried cardboard boxes first, thinking they would breathe. They held moisture instead. By spring, a wool coat smelled like a basement corner and the box bottom had softened into pulp. Plastic bins with gasket seals or simple vacuum bags are the safer bet for anything stored longer than a month or two. Cardboard under a bed is a mistake you only make once.
Roll In a Cart for Flexible Storage
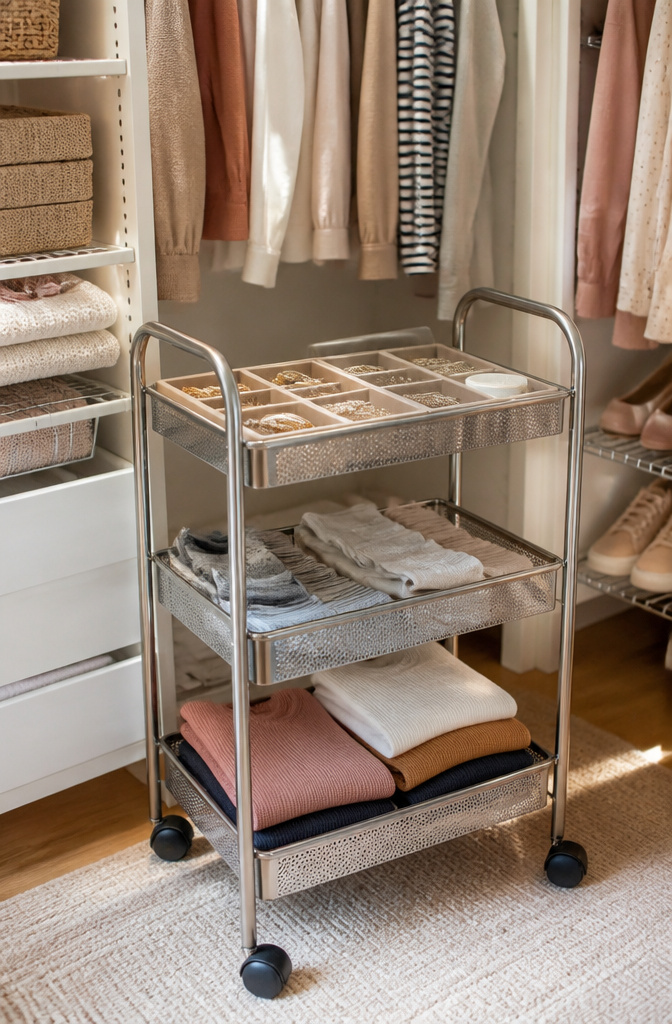
A metal rolling cart tucked between shelf towers or parked under hanging clothes turns dead floor space into storage that moves when you need it to. I keep jewelry on the top tier, socks and tank tops in the middle, and bathing suits with small accessories on the bottom. The whole unit rolls out in one motion for vacuuming, which matters more than I expected, since keeping items off the floor is what keeps dust from collecting in the first place. The catch is the wheels. Hard casters on wire frames will scratch wood or peel vinyl over time, so a thin mat underneath is worth the small trade in height. For renters, the cart wins because it leaves no marks and travels to the next closet intact.
Turn the Whole Closet Into Something Else
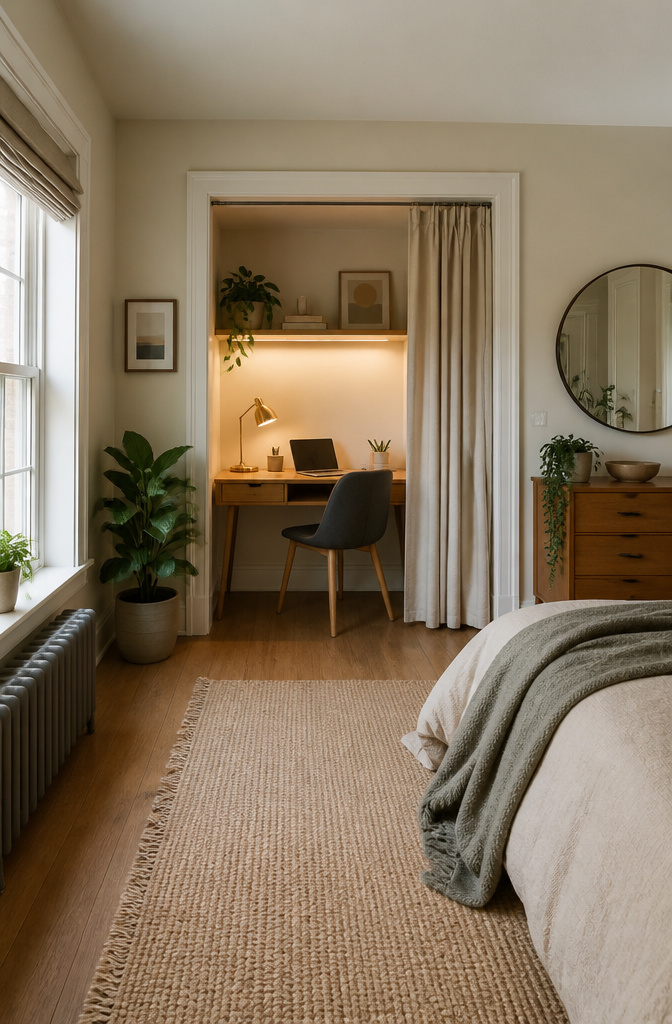
A closet stripped of its rod and shelf becomes a room you did not know you had. The Manhattan studio project that turned 9 square feet into a working desk plus seasonal clothing storage is the proof most renters need: the divider, not the dimensions, is what makes it feel like two spaces instead of a desk shoved into a hole.
Re-envisioning a smaller-than-average closet into a WFH nook is an ingenious DIY project that this Manhattanite tackled on her own, creating a home office space she didn’t have before.
That 9 square feet is smaller than most reach-in closets in older apartments, which tells you the bar is lower than you think.
My neighbor gave up her guest closet entirely to a printer, a filing tray, and a wall-mounted fold-down desk she found secondhand. Guests lost a place to hang coats; she gained a door she can close on work at six o’clock. She regrets nothing, and the curtain over the opening, borrowed from the spare-bedroom-office trick, means she does not have to look at toner cartridges while eating dinner.
The craft corner approach works the same way with the doors removed and the contents treated as display rather than clutter. Vintage-look wood shelves on black brackets turned one junk closet into a design feature at $550. The same bracket-and-board system, sized to your closet depth, holds spools, paper, or a reading lamp without the bespoke price.
The choice is whether you need the closet to still read as storage or as something else entirely. The divider keeps both; the curtain or removed doors commit.
Build Up With Shelves and Hooks
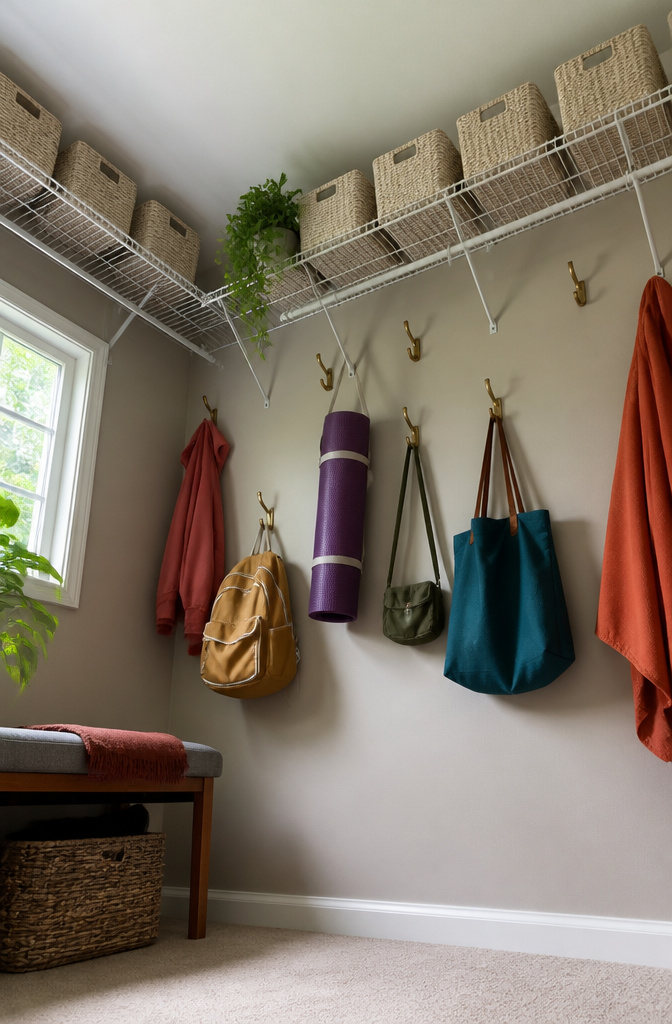
Vertical space in a closet usually goes to waste because the top shelf feels too high to reach daily. I fixed that by adding a second row of wire shelving twelve inches below the ceiling, just deep enough for labeled woven bins. Out-of-season clothes and extra linens go up there; the bins keep dust out and the labels mean I do not pull four containers down to find one sweater.
The walls and door are fair game too. I hung a yoga mat on a removable hook rated for five pounds, and it has held for two years. A heavier vacuum attachment organizer, maybe two pounds, fell twice before I added extra strips and checked the weight limit printed on the package. Command strips list a capacity per strip, and doubling up beats replacing drywall later. For bags, belts, and robes, small hooks on the side of a shelf work better than the back wall, where everything tangles in the clothes.
Switch to Matching Hangers
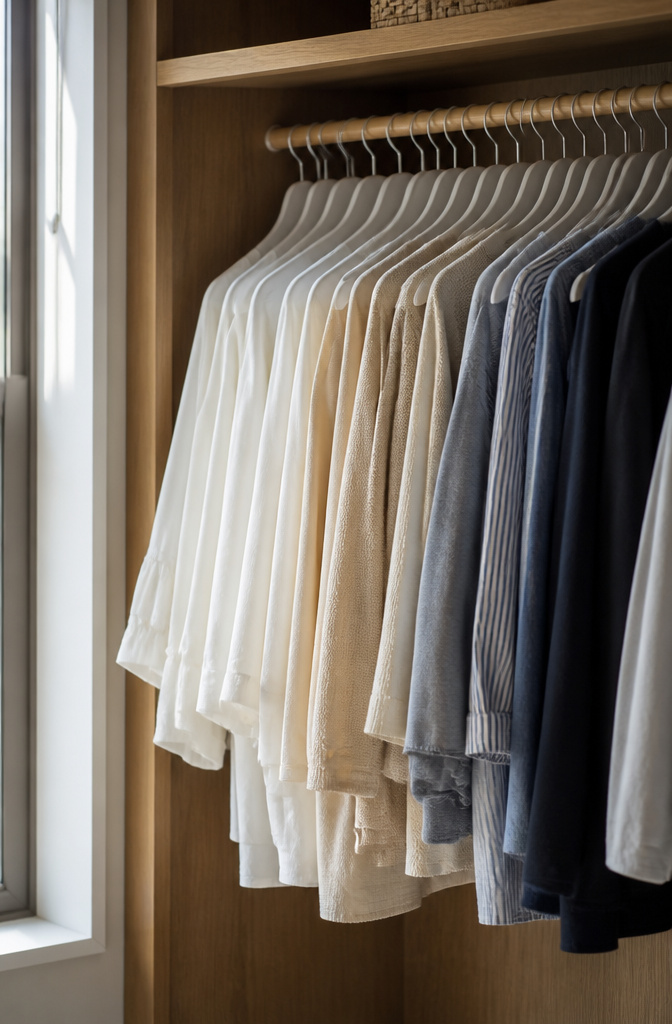
Matching hangers do more for closet space than most organizers admit. The visual calm alone makes the rail feel intentional, but the real gain is physical: slimline plastic hangers add inches of usable width where bulky wire or shaped hangers eat it. I switched my own closet in stages, not all at once, because forty hangers at full retail prices felt like a silly splurge. Felt hangers grip slippery blouses and camisoles without the bulk of clips. Wood hangers keep suits and coats in shape without the shoulder bumps cheap hangers leave behind. I spent about thirty dollars on the first batch of twenty slimline hangers, swapped the rest two months later when a sale hit, and the closet looked finished long before the second box arrived. The mixed phase actually helped: living with half-matched hangers for those weeks made the visual clutter obvious every morning, which convinced me the second purchase was worth finishing.
Sort Shoes by Type or Stack Them in Bins
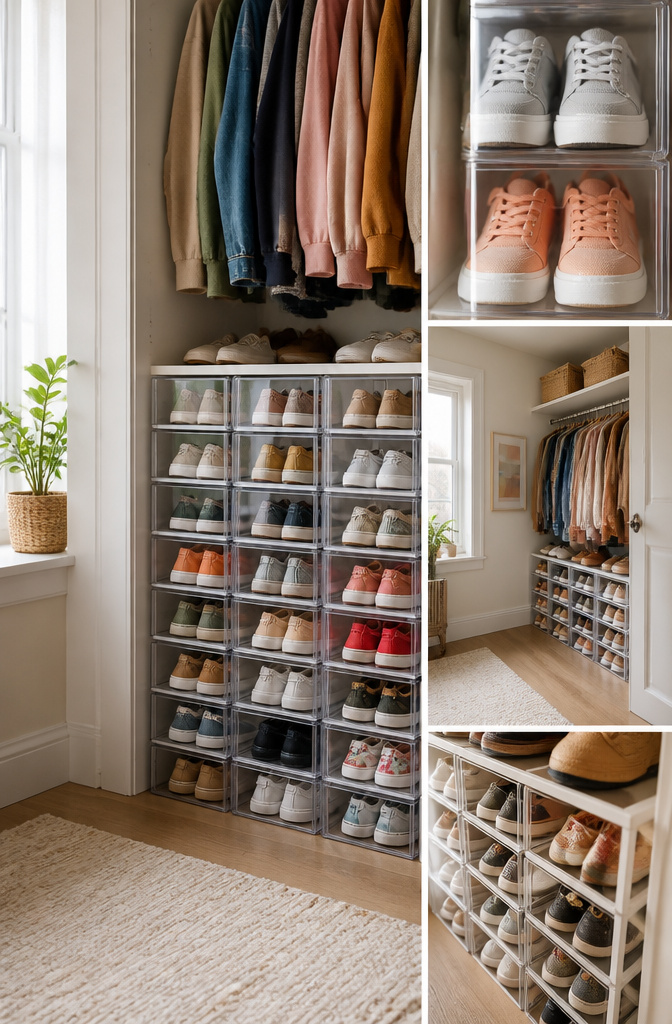
Shoes tend to become the first thing that turns a closet from organized to chaos, and in my experience the fix depends on how often you reach for each pair. Clear front-facing bins work best for daily wear: sneakers, loafers, the pair you grab for errands. You can see the color and style without pulling the bin down, and stacking two or three on the floor keeps the footprint small. I labeled mine with a cheap label maker, heel-to-toe, and the system stuck because it took zero thought in the morning.
For occasion shoes, boots you wear twice a winter, anything with a heel that sits idle for weeks, solid stacking boxes are the better call. They protect the leather from dust and they stack higher without looking messy. The bins I used for this were large pantry-style stacking bins, the kind sold for kitchen goods, and they worked for years before I repurposed them elsewhere in the house.
Overdoor racks handle the overflow, the pairs that do not fit either system. That part my household actually used; the labeled bins, less so. Within a month the daily pairs were back to a kicked-off pile on the closet floor. The labels were still readable, the bins still clear, but the two-second delay of opening a lid was apparently too much. If you live with someone who will not lift a flap, skip the bins and give them an open shelf at knee height.
Rotating Clothes by Season
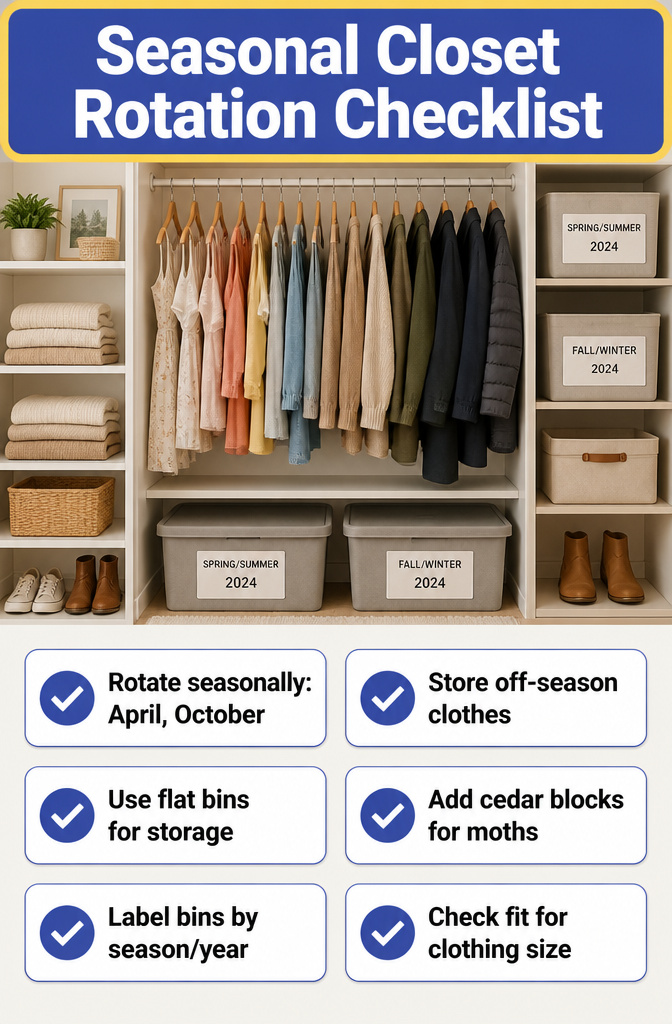
Rotating clothes by season is the fastest way to reclaim a closet that feels full even after you have pared down. I keep only what matches the weather outside, and the rest goes into flat bins that slide under the bed or onto the top shelf of the linen closet. The switch happens twice a year, usually on a Sunday in late April and again in early October, before the first real cold snap or heat wave hits.
The payoff is immediate: half the hangers disappear, so everything left has room to breathe. Coats stop crushing sundresses; heavy sweaters no longer stretch out the shoulders of lightweight blouses. I fold the off-season pieces, add a cedar block against moths, and label the bin by season and year so nothing gets forgotten. A spare closet or basement corner works if the bed is too low, but the garage is risky unless the space stays dry. Clothes stored damp come back smelling like regret.
For anyone in a season of life where sizes shift, the same system applies. What fits now hangs; what does not goes into rotation. The closet stays functional, and when your body changes, the bin you open feels like shopping your own archive instead of facing a squeeze.
What Works for Renters Who Cannot Drill
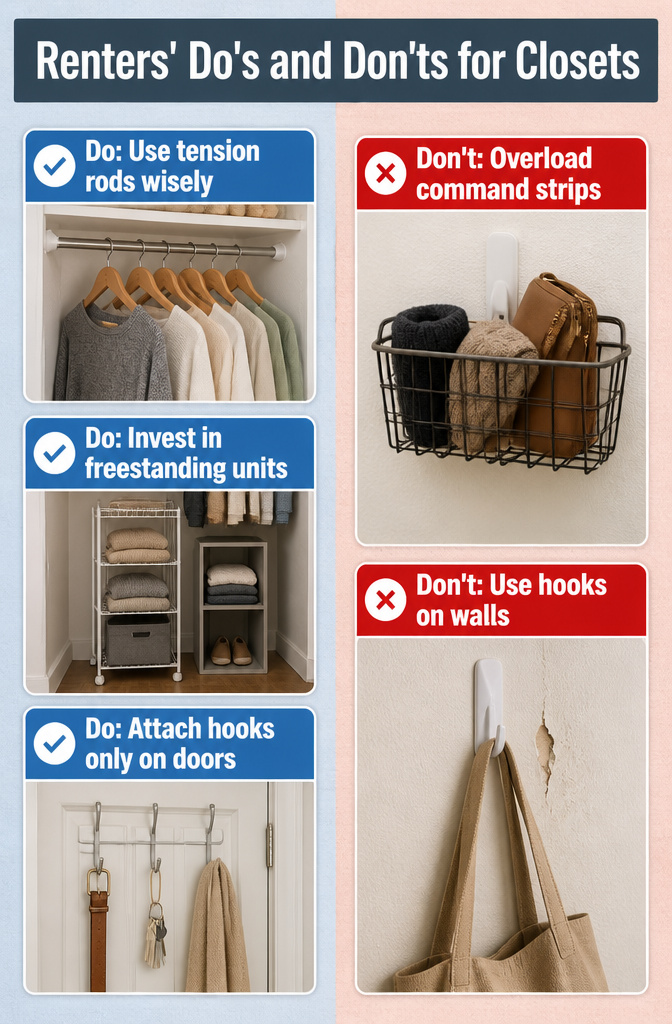
Command strips and tension rods are the two tools that have kept my security deposit intact through three apartments. A tension rod rated for the weight you actually load it with will hold a surprising amount, but the spring mechanism leaves circular marks on painted drywall that take a dab of primer to hide. I learned that after propping two rods across a narrow linen closet and finding faint rings at move-out.
Freestanding units solve the marking problem entirely. A narrow wire rack or stack of open cubes sits on the floor under hanging clothes, and you roll it out when the lease ends. Overdoor hardware is even cleaner, though the hook sets that drape across the top of a closet door can chew the paint along the edge if the fit is tight. I keep a scrap of felt tape behind the contact points now.
The real damage I have had to patch came from removable hooks used past their limit. A command strip holding a wire basket of scarves pulled a dime-sized chip of latex paint free when it finally gave way. The strip held, but the paint did not. For anything heavier than a yoga mat or a single belt, I now use the damage-free hooks only on the back of the door where a scuff matters less, and I test the hold for a week before loading it fully.
IKEA PAX Against Elfa Against EasyClosets
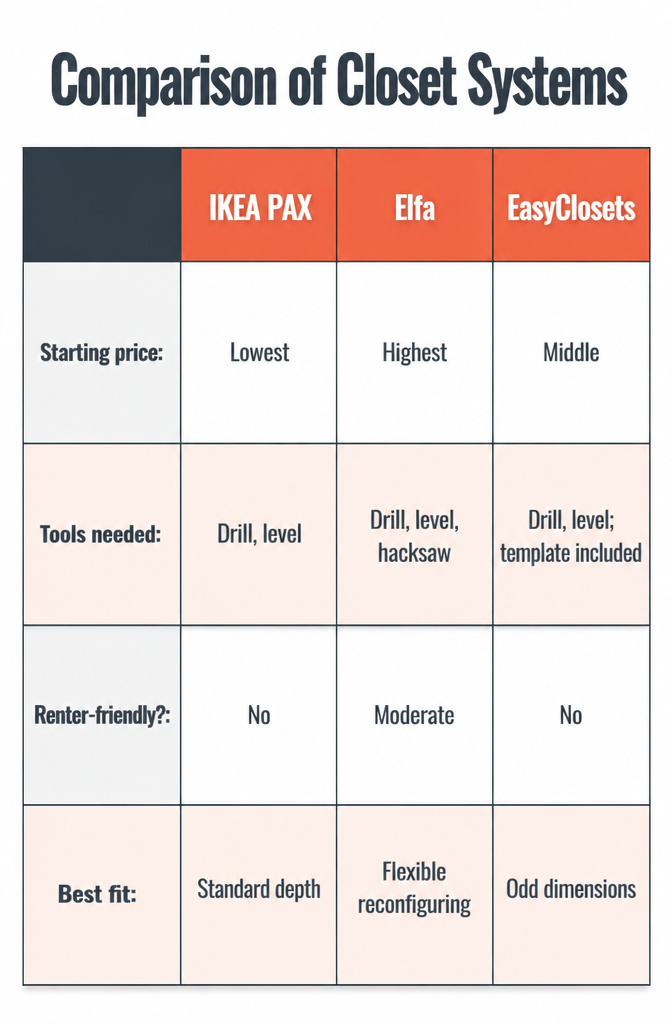
Built-in closet systems run the gamut from flat-pack to full custom, and three names come up most often for the kind of project you can finish in a weekend without a contractor’s budget. IKEA PAX ships as melamine panels and rails you bolt together; the finish options are limited and the depth is fixed at either 13 3/4 or 22 7/8 inches, but a basic 39-inch wardrobe frame starts around $110 and the KOMPLEMENT interior line lets you swap shelves for drawers later. Elfa sells wire shelving and drawer systems through The Container Store, with a free design service and a heavier price per linear foot, though the platinum finish reads more polished than PAX’s white laminate. EasyClosets sits between them: all-wood laminate panels cut to your measurements, shipped with a drilling template, and priced closer to Elfa than to IKEA but with fewer finish choices.
| IKEA PAX | Elfa | EasyClosets | |
|---|---|---|---|
| Starting price for a 6–8 ft wall | Lowest | Highest | Middle |
| Tools needed | Drill, level, maybe a second person | Drill, level, hacksaw for cutting rails | Drill, level; template included |
| Renter-friendly? | No; wall-anchored, semi-permanent | Moderate; wall standards, easier to patch | No; wall-anchored like PAX |
| Best fit | Walk-in or reach-in with standard depth | Reach-in closets, flexible reconfiguring | Odd dimensions, sloped ceilings |
For my own rental years, Elfa’s wall-mounted standards would have been the only one of the three I could have removed without a spackle marathon. PAX and EasyClosets both demand anchor holes you will need to patch later, and PAX’s fixed depths waste space in shallow alcoves. If you own and plan to stay, EasyClosets’ custom cuts use the full volume better; if you might move in two years, PAX’s lower buy-in stings less when you leave it behind.
What I Spent on My Last Closet Redo
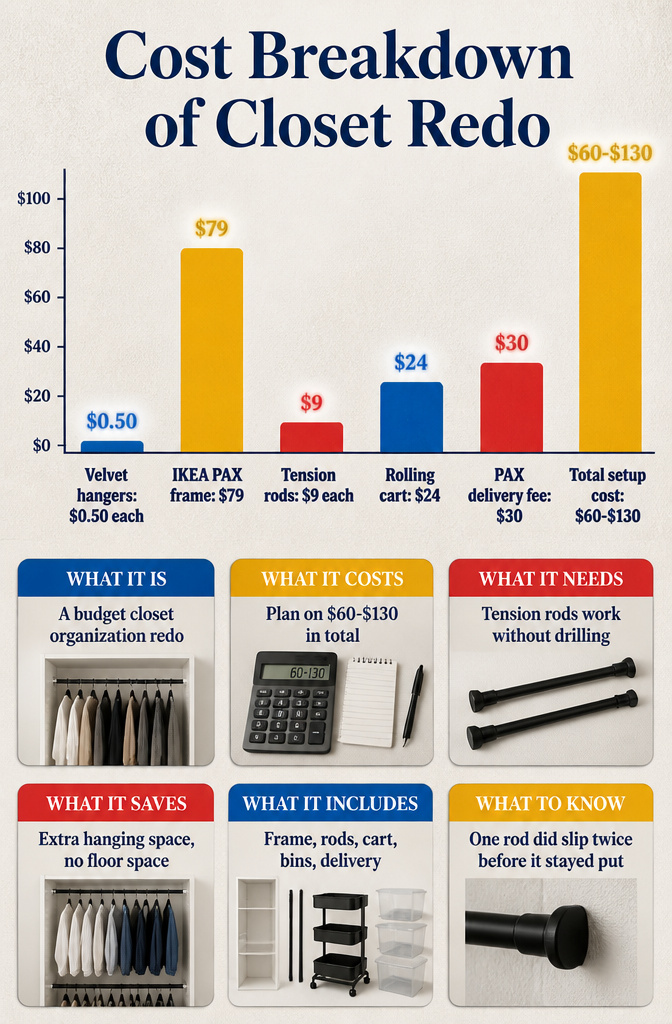
Velvet hangers run about fifty cents each when you buy a bulk pack, and swapping out a whole closet’s worth adds up faster than the Instagram photos suggest. For my last redo I bought sixty for thirty-two dollars, then grabbed a single IKEA PAX frame at seventy-nine and skipped the interior fittings entirely. Two tension rods from the hardware store cost nine dollars each and gave me a second level for shirts without drilling anything into the landlord’s walls. A three-tier rolling cart was twenty-four, and four clear shoe bins stacked underneath ran six dollars apiece.
The surprise cost was the PAX delivery fee, which tacked on another thirty because I could not fit the flat pack in my sedan. Plan on sixty to a hundred thirty dollars in total for a similar setup, depending on whether you already own the bins or need the cart. The tension rods paid for themselves in saved floor space, though one did slip twice before I figured out the right wall pressure.
Tools for a Weekend Install
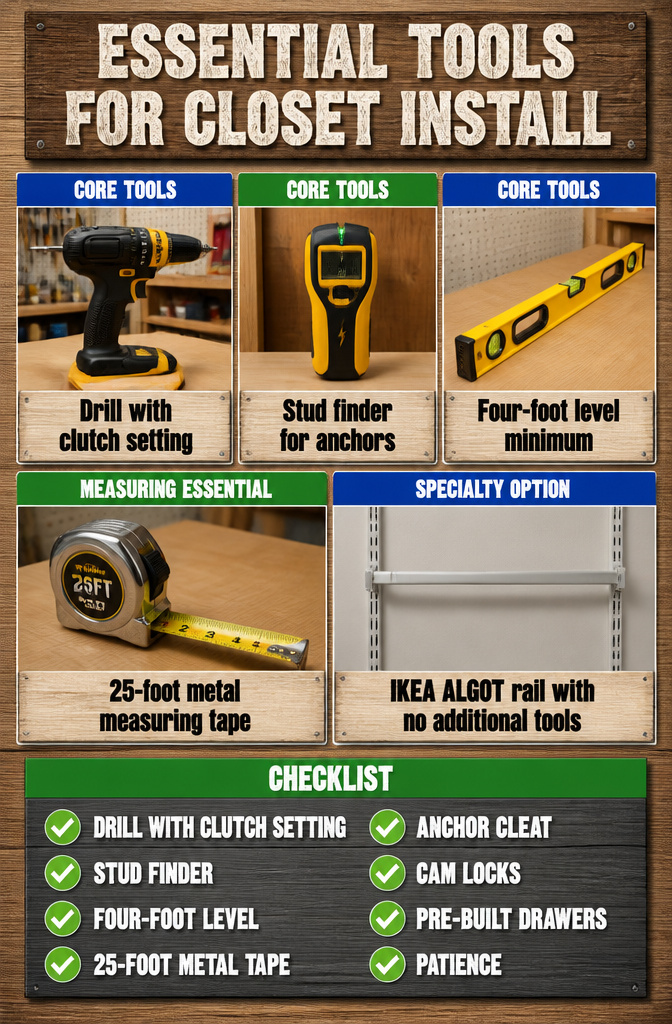
A weekend closet install lives or dies on whether the right tools are actually in the room when you start. Here is what I keep on hand, what I skip, and what I borrow.
- Drill with a clutch setting so you do not strip the soft cam screws that come in most closet kits. I bought a mid-range cordless set years ago and it has outlasted three closet redos.
- Stud finder for anchoring the hanger cleat or any rail that holds real weight. The cleat carries the whole vertical system; drywall anchors alone will sag within a season. I borrowed my neighbor’s electronic finder for my first install, then bought my own once I saw how slow the job goes without it.
- Four-foot level at minimum. A two-foot level will lie to you on a wall that is not plumb. The hanger cleat must be straight or every module hangs crooked.
- Measuring tape, metal, 25 feet. Plastic tapes stretch and cost you a quarter inch where it matters most, between the side panels.
The IKEA ALGOT extendable rail and similar second-rail kits often need nothing beyond a drill and level. A full modular system with hanging cleats, cam locks, and pre-built drawers demands more patience but not more tools.
Frequently Asked Questions
How do I organize a small closet?
Start by pulling everything out and applying a strict one-year rule: if you have not worn it in twelve months, remove it. That single filter typically opens up about a third of the rod space before you add any hardware. From there, install a system you can adjust or take apart, measure your depth before ordering anything deeper than 20 inches, and group clothes by how you actually dress rather than by formality.
What are some creative empty closet space ideas?
Strip out the rod and shelf to build a desk nook, a craft corner, or a mini office you can hide behind a curtain. One Manhattan studio turned just 9 square feet into a working desk plus seasonal storage by adding a simple divider. A wall-mounted fold-down desk, vintage-look shelves on black brackets, or a rolling cart tucked between towers can all turn dead closet space into active room you did not know you had.
How can I maximize space in a small closet?
Add a second rail at 42 inches from the floor to turn the dead zone under hanging shirts into active storage for pants or a child’s wardrobe. Build upward with a second row of shelving twelve inches below the ceiling for labeled bins, and use the back of the door and side walls for hooks rated to their actual load. Switching to slimline hangers can add inches of usable rod width where bulky hangers eat it.