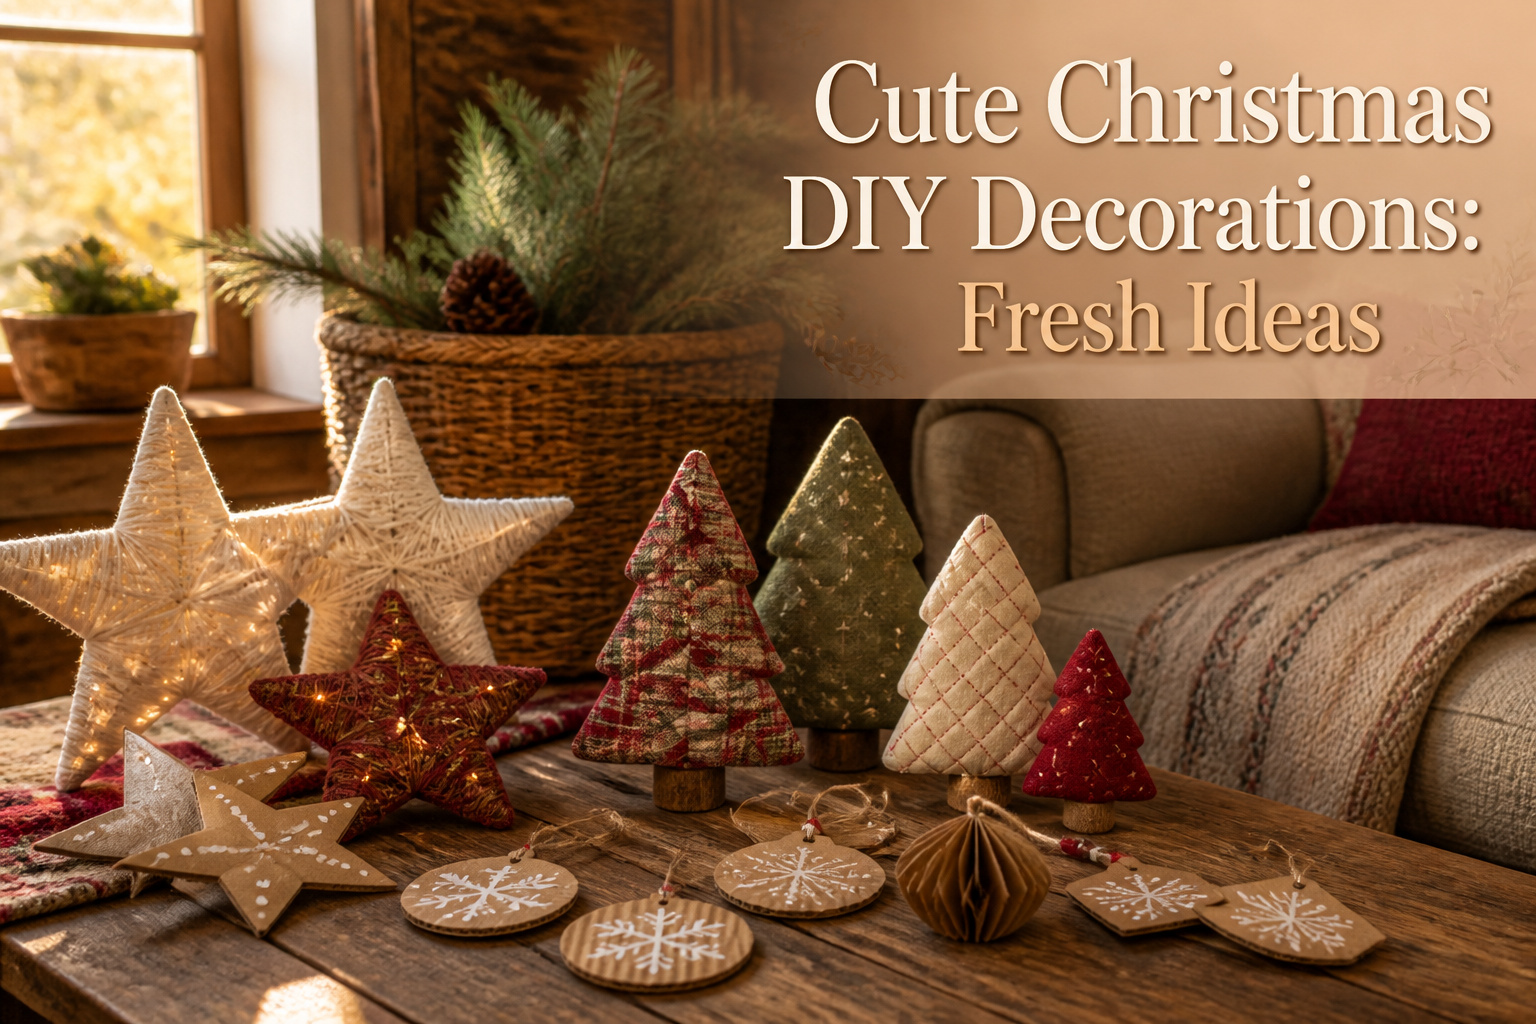
Cute Christmas DIY decorations are handmade ornaments and accents you build from craft-store basics and household scraps. The difference between charming and amateur comes down to material weight: cardboard stars need doubled corrugated layers to stand without buckling, and quilted trees collapse into pillows if the batting is too thick. A single skein of worsted-weight yarn covers roughly two feet of star diameter, and that texture catches tree lights in a way flat paint never manages.
1. Oversized Stars

Cardboard gives the fastest payoff for oversized stars that actually read from across a room. I trace a five-point template onto a shipping box, cut two identical shapes with a utility knife, and slit one from each point toward the center so the halves slot together into a standing form. The armature is done in twenty minutes.
The finish is where the scale pays off. Flat acrylic paint reads as posterboard under overhead lights, so I wrap the surface in yarn, working from the center out and anchoring each point with a dab of hot glue. The texture catches tree lights and window glow in a way smooth paint never manages. A single skein of worsted-weight covers roughly two feet of star diameter.
Hanging without lease violations means skipping nails entirely. I run a loop of yarn through the top point and suspend the finished star from a tension rod set inside the window frame, or from a removable hook rated for the weight. The cardboard build stays light enough that a standard adhesive hook holds it, though I check the label weight limit before trusting one above the sofa.
2. Baby Bows

Ribbon width matters more than I expected when tying small bows for tree branches or garland. Three-eighths inch ribbon holds a crisp loop without collapsing under its own weight, while anything wider than five-eighths inch starts looking like a present bow that swallowed a shrink ray. The narrow satin or grosgrain sold on spools near the gift wrap section works well enough, though I have better luck with wired ribbon when the bow needs to sit at a specific angle on a branch.
The tying method that keeps them presentable is simple but finicky. I make two loops, cross them, and pull one through the center knot tight enough to hold but not so tight that the ribbon puckers. Wired edges let me shape the loops afterward into something symmetrical, which is worth the slight stiffness against ornaments. Plain ribbon without wire still works for gift toppers where the bow sits flat and does not need to defy gravity.
Where I stopped bothering was below two inches of finished bow. At that scale my fingers fumble the center knot, the loops look lopsided no matter how I trim the tails, and the time spent fussing does not match the visual payoff on a tree already busy with lights and ornaments. I tie a few for garland where the repetition hides individual flaws, but for branch accents I draw the line at two and a half inches and let slightly larger bows carry the detail instead.
3. Paper Candle Ornaments
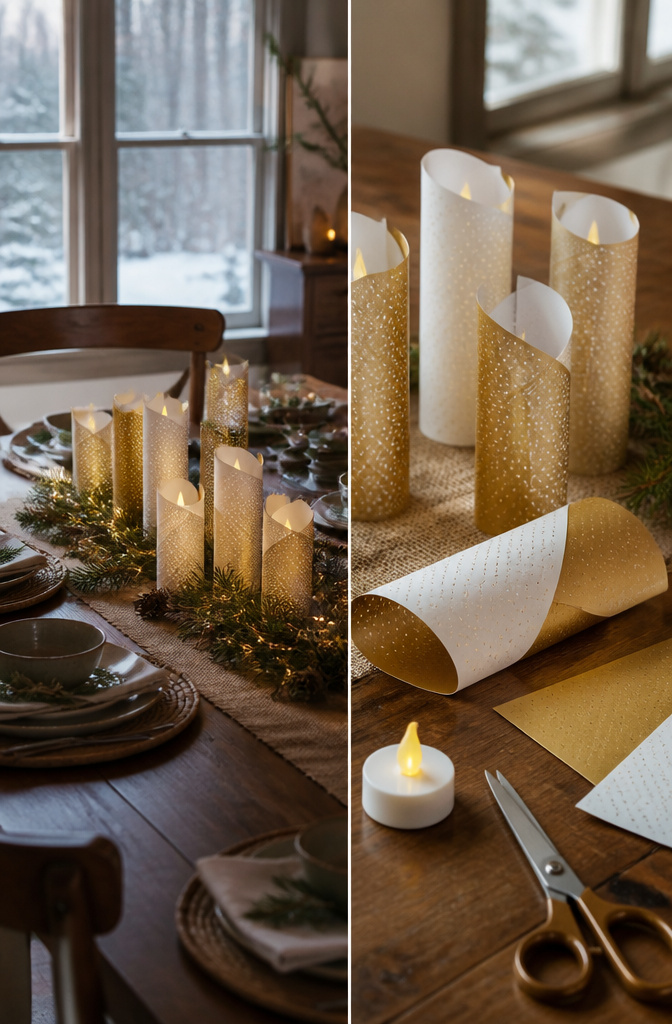
Paper candle ornaments start with the right paper weight. Card stock around 65 lb holds a crisp fold without going limp by New Year’s, but the lighter copy paper I tried one year sagged into sad little tubes before the solstice. Rolled cylinders need a double layer or an internal support, a strip of the same stock glued inside to keep the shape.
The LED tea light question comes up because the look begs for a flicker. A battery-operated votive tucked into a rolled paper sleeve works; a real flame does not. Even at a distance from branches, heat rises, paper dries further, and the risk outlasts any charm. I skip the flame entirely now.
The one that collapsed on me mid-December was a folded design with a pointed top, pretty in theory, built from 80 lb cover stock that turned out too stiff for the narrow base. The creases split under their own tension after two weeks of dry winter air. Thinner paper with a scored fold, or a wider footprint, would have saved it.
4. Popcorn Garland
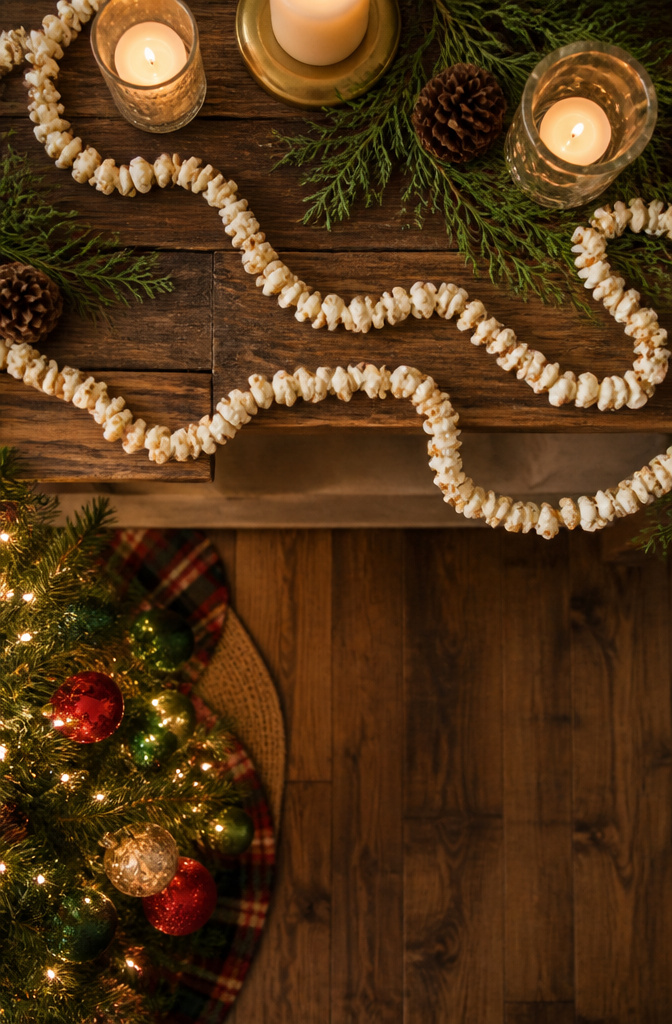
Plain, air-popped kernels hold up for a full season without turning greasy or rancid. The microwave bags coated in butter or oil will soften and smell off within days, so skip anything flavored and pop your own in a pot or air popper. A heavy quilting thread or thin upholstery cord works better than standard sewing thread; it does not cut through the soft centers and it tangles less as the strand grows. The needle matters more than I expected. A long doll needle, roughly two to three inches, lets you spear each kernel without pinching it between your fingers and crushing the shape.
I assumed a bowl of popcorn would string into yards of garland in an evening. The actual pace is closer to six to eight feet per hour once you account for dropped kernels, tangled thread, and the slow rhythm of piercing each piece near the center so it sits flat. A six-foot mantel drape or a single tree wrap takes about two hours, which changes how you schedule the project if children are helping. The garland dries slightly brittle over the weeks, so drape it loosely rather than pulling it taut; a tight strand will snap when someone brushes against it.
5. Orange and Clove Pomander Ornaments
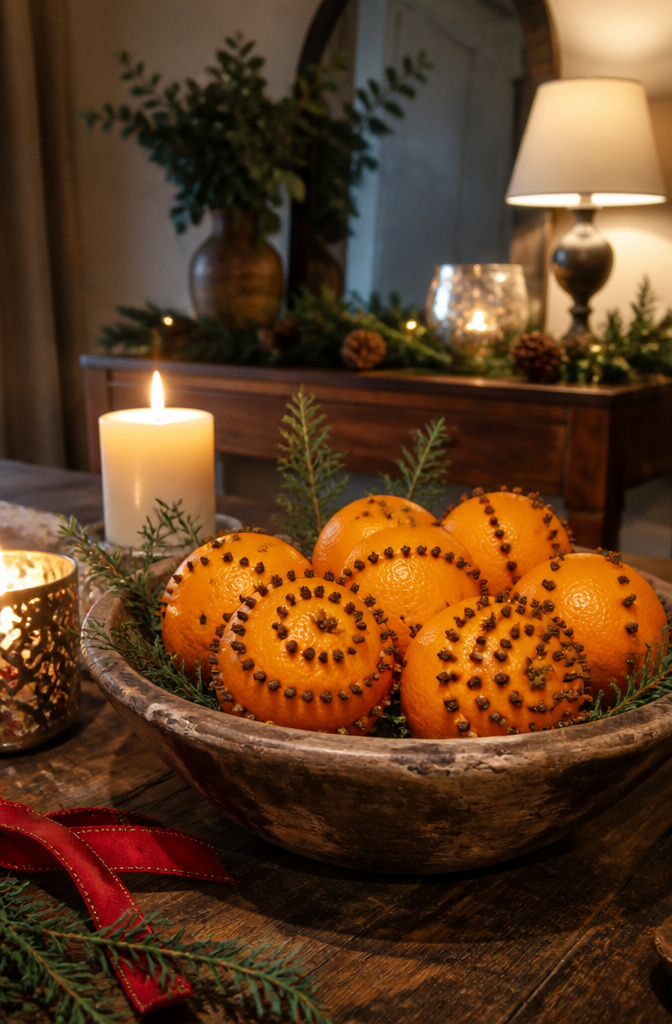
The scent of orange and clove pomanders hits like a memory of Christmas you forgot you had. Whole oranges get studded with cloves in whatever pattern you like, then left to dry until the fruit shrinks and the spice deepens. Poke holes with a pin or the bent end of a paper clip first, then push the cloves in; your thumbs will thank you, because forcing cloves straight through the rind is the fastest way to bruise the fruit and wreck the look.
Ribbon wrapping is optional. If you want them as tree ornaments, cut a long piece of orange ribbon, find its middle, set it on the orange’s navel, wrap around both sides, turn the fruit 45 degrees, and wrap again. Tie a knot with a loop for hanging, then fill the spaces between ribbon with cloves. For a bowl display, skip the ribbon entirely and cover the whole surface.
The real risk is mold. Pomanders stay sticky for days after the last clove goes in, and sealing them too early traps moisture. Let them sit in a dry spot with space between each one until the skin hardens and the surface no longer feels tacky. Rush this step and the ornament turns soft and musty inside, wasting the cloves and the afternoon you spent on it.
6. Mini Wreath Ornaments

Grapevine wreaths scaled down to ornament size look surprisingly substantial on a tree, though anything wider than about three inches across starts to compete with the branches around it. I found the sweet spot at two to two-and-a-half inches in diameter, small enough to read as delicate but large enough to take real greenery.
Wire forms run lighter and cheaper, which matters when you are hanging twenty of them. Dollar Tree carries packs of miniature wire wreaths seasonally, and floral supply shops stock them year-round for under a dollar each if you buy a dozen. Grapevine runs a little more, but the texture hides glue and wire better, so the finished piece looks like something you assembled rather than something you merely bought and hung.
For filling them, dried boxwood or seeded eucalyptus holds its shape without the water weight of fresh cuttings. A six-inch snippet wired to the frame covers most of the circle, and a narrow velvet ribbon bow, maybe half an inch wide, finishes the bottom without pulling the whole thing off balance. Hot glue works, though floral wire twisted through the back keeps the greens from shifting if the ornament gets knocked around in storage.
7. Prize Pine Tree

A foam cone from the craft store, maybe twelve inches tall, becomes the skeleton for a miniature advent tree that sits on a side table instead of the floor. The base matters more than the shape itself. A flat wooden plaque, roughly six inches square, gives enough footprint to keep the thing upright once ribbons and tiny clips start weighing down one side. Hot glue the cone’s bottom directly to the plaque, then wrap the seam with a strip of burlap or velvet so it reads as intentional.
For the daily additions, small alligator clips from the floral aisle open wide enough to grip thin ribbon or paper tags without tearing. Press them straight into the foam where you want them; they hold surprisingly well and pull out clean if you change your mind. I learned the hard way that clothespins look charming in photos but snap off under any real weight.
My tree tipped on day four because I skipped the counterweight. A heavy ceramic ramekin tucked under the plaque would have saved the whole display. After the fall, I reglued the cone and added a brick wrapped in leftover velvet, hidden beneath a ring of faux snow. The tree stayed put through the rest of December, though the top ornament now sits slightly crooked, which honestly looks more lived-in anyway.
8. Quilt Tree

Quilted fabric gives a tree shape warmth no paper or pinecone can match, and the batting thickness is what makes it read as dimensional rather than a flat wall hanging. A low-loft cotton batting, about the thickness of a flannel shirt, puffs the seams into soft ridges without turning the whole piece into a pillow. I tried a standard polyester batting first and the tree looked like a stuffed toy, which was not the direction I wanted.
The construction question is whether to stuff sections or flat-line them. Flat-lining, where batting is layered and quilted through but left hollow, gives the gentlest relief and keeps the piece light enough to hang from a single nail. Stuffed channels, sewn like a trapunto technique, create bolder shadows but demand more precise seam allowances and a backing fabric that will not pucker. For a weekend project, flat-lining forgives more sins.
Fabric scraps dictate the palette more than any plan. I had enough remnants from two earlier projects, a navy gingham and a faded red calico, to cover about two-thirds of the tree. The rest came from a remnant bin at a local shop, where a cream muslin and a narrow green stripe cost under eight dollars together. The scraps with the most character, the ones already softened from washing, went at the top where the eye lands first.
9. Star Yarn Ornaments

Cardboard frames work for yarn stars, but the material has to survive tension without buckling. A cereal-box weight warps after the second point; doubling up to a corrugated layer, or cutting the frame from the flap of a shipping box, keeps the shape while you wrap. The X-Acto knife matters more than the yarn here: a clean edge means the yarn seats flat instead of catching on fuzz.
The wrapping pattern I kept misjudging was the point coverage. Running yarn straight across the front leaves the tips bald. What covers cleanly is a figure-eight around each point: front to back, crossing behind, so the yarn stacks on itself and builds a solid cap. Hot glue at the back of each point, not the edge, locks the stack without a visible bump.
For yarn weight, worsted covers in two passes without looking ropey. Anything lighter and you are wrapping four times to hide the cardboard; anything heavier and the star starts to look like a stuffed toy. A dab of glue at the start and one at each point, plus a loop glued to the back for hanging, and the ornament is done in ten minutes.
10. Terra-Cotta Tannenbaum
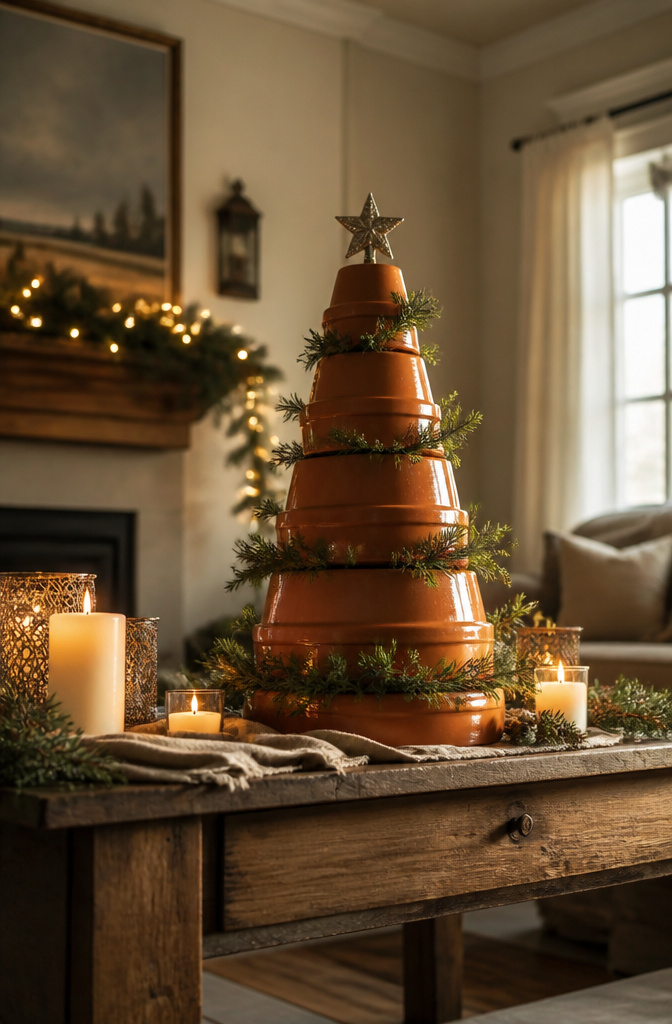
Stacking terra-cotta pots into a tree shape looks simple until the third one wobbles and the whole column leans like a drunk pencil. The trick is nesting three graduated sizes, each rim fitting inside the one above so the weight centers naturally rather than fighting you. I dry-stack mine first on the table, no glue, because the heaviest pot on bottom and the lightest on top already want to stay put if the surface is level. A dot of construction adhesive between rims keeps them there permanently without the bulk of hot glue or the cure time of epoxy.
Paint chips where terra-cotta breathes, so sealing matters more than the color choice. A coat of clear acrylic over whatever green or white you picked keeps the surface from flaking when someone bumps the shelf in January. The finished piece weighs enough that I never worry about a cat or a cord pulling it over, but I still keep it off the edge of anything.
11. Cloth Peppermints

A bowl of these on the buffet reads as candy from across the room, but up close the fabric texture gives them away as something you made. The ticking stripe does most of the work: 6.5 by 4 inches of red and white fabric, pinking sheared on the short ends so it doesn’t fray where the tie sits. Two wood craft rings, each 2.2 inches, glued together give the body something to wrap around, and red rickrack pulls the ends tight.
The gathering stitch length is where I went wrong twice. Too short and the fabric bunches like a drawstring bag; too long and the puff collapses flat. What worked was a running stitch set roughly a half-inch from the edge, pulled just enough to cup the rings before the stuffing goes in. The first time I stuffed them firm like a pillow, and they sat like hard discs. The second time I barely filled them, and the stripes went wavy. A loose handful of polyfill, pressed in after the fabric is wrapped but before the rickrack knot gets cinched, holds the shape without fighting it.
Stripe alignment matters more than I expected. The candy illusion depends on the lines meeting at the tie points, not spiraling. Lay the rectangle so the stripes run the short direction, wrap with the pattern centered, and check the overlap before you commit the hot glue on the rings.
12. Bingo Forest
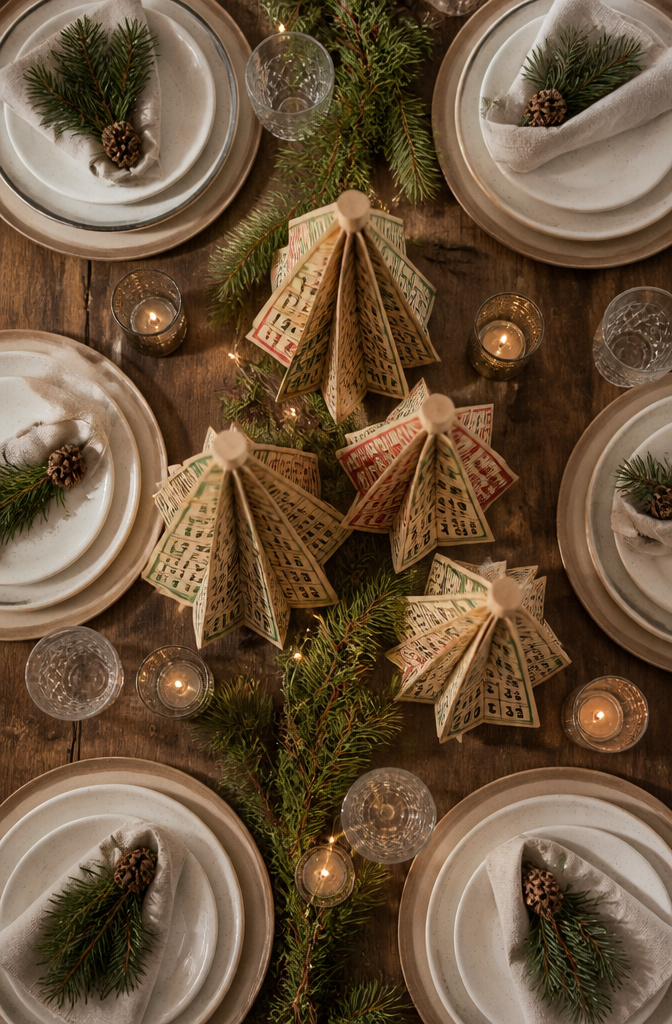
Vintage bingo cards fold into small trees without much fuss, though the stock matters more than I expected. The reproduction cards sold as craft paper, usually 65–80 lb cover weight, crease cleanly where the older, thicker collector cards tend to crack along the fold. I learned that after watching a 1950s card split at the spine while a modern reprint held a sharp edge.
Three to five half-tree shapes cut from matching cards stack around a 3/8-inch dowel, flat edges glued and fanned so the printed numbers show from every angle. A single bingo tile hot-glued to the top finishes the shape. Wooden spools make the steadiest bases, tall enough to bury the dowel a couple inches deep so the tree stands straight without wobbling.
Real vintage cards run steep on auction sites, especially near the holidays. Estate sales and flea markets sometimes turn up partial sets for a few dollars, but the reliable source is reproduction bingo paper sold in 25-sheet packs through craft retailers. The print quality is close enough that the charm stays intact, and the lighter weight folds where you need it to.
13. Craft Bead and Button Snowman

Stacked bead snowmen live or die on the size jump between each body section. A 20 mm base with a 15 mm middle and a 10 mm head reads as proportional; push the middle too close to the base and the figure turns into a lumpy cylinder. Wooden craft beads in those three sizes thread neatly onto 20-gauge wire, which is stiff enough to stand upright but thin enough to pass through standard bead holes without drilling.
Baker’s twine works too, though it frays where wire kinks. The real trouble shows up in the base bead. Too small, under about 15 mm, and the snowman topples at the slightest nudge or hangs crooked on a branch. I learned that the hard way with a batch of 12 mm bases that all ended up glued to pennies for ballast. The fix is simpler than the fix-it: start at 20 mm or pair a 15 mm bead with a wider wooden button underneath as a foot.
Faces drawn with permanent marker on the top bead keep the project at the weekend-craft level, no paint drying time required. A brown button at the bottom, two plain buttons above it, then the face bead, then five or six small black buttons for a hat, all cinched tight with a double knot and a two-inch loop for hanging. A strip of red felt tied between the top two buttons finishes the scarf.
14. Yarn Ornaments

Yarn ornaments start with a choice between structure and softness. Cardboard templates, cut with an X-Acto knife into stars or simple shapes, give you a firm form to wrap around. Dabs of hot glue at the points hold the yarn in place while you work, and the finished piece keeps its geometry on the tree. The alternative is free wrapping around a clear plastic bauble or your own pompom core, which gives a softer, rounder silhouette that reads more like a knitted thing than a geometric one.
The yarn itself matters more than the color. A three-ply or four-ply worsted weight holds tension without collapsing; laceweight or single-ply fuzzes out and loses definition. For template shapes, medium weight covers cardboard cleanly in about fifteen minutes per ornament. A wrapped ball the size of a standard plastic ornament takes roughly the same time, though pompoms run faster once you get the fork-and-tie rhythm down.
The cardboard method wins if you want flat silhouettes that pack away without denting. Free wrapping wins if you already own the baubles and just want to hide them. Either way, the materials cost stays under a few dollars per piece, and the whole batch finishes in an evening.
15. Merry Little Mobile

A mobile stays interesting only if it actually hangs still. My first attempt spun like a ceiling fan every time the heat clicked on, which taught me that balance is math, not guesswork.
The crossbar wants to be light; embroidery hoops wrapped in ribbon keep the whole frame under a few ounces. Two hoops, one 9-inch and one 10-inch, give you nested rings without much weight. String crosses each hoop in two lines that meet at the center, and a 8 1/2-inch piece of craft wire bent into hooks at both ends links the pair together.
String length is where I went wrong. I cut everything the same and hung cookie cutters from the lower hoop, then watched the whole thing torque to one side. The fix was simple: measure from the center point, not from the hoop edge, and shorten the twine on heavier pieces by half the difference in cutter weight. A small star cutter hangs two inches farther out than a gingerbread man if the gingerbread man weighs more. Adjust until the crossbar sits level, then tie off. The mobile I ended up with stays put even when the hallway air moves.
16. Glittered Cookie Cutter Centerpiece

Metal cookie cutters become small sculptures when you fill the negative space instead of leaving it empty. I traced each shape onto heavy cardboard, cut the backing slightly smaller than the cutter rim, and hot-glued the metal to the card so the edge sat flush like a shallow tray. A coat of Mod Podge inside, a pour of glitter, and the excess taps out through the cutter’s own seams. Polyurethane varnish over the cured glue is what keeps glitter off the tablecloth; without that topcoat, you will find red and green sparkle on your hands through New Year’s.
The bases matter more than the glitter. A cardboard back glued to a wood craft block sits upright without rocking. I tried standing cutters on their handles first, but a gingerbread man tipped at the first bump of a water glass. The block base, painted matte black, disappears against a dark table runner.
Cleanup is real. I vacuumed the craft mat, wiped the table, and still found a fleck of gold on the kitchen floor in February, carried on a shoe sole or a sweater cuff. The glitter that escapes is the price of the look; the varnish only controls where it goes.
17. Cookie Cutter Garland
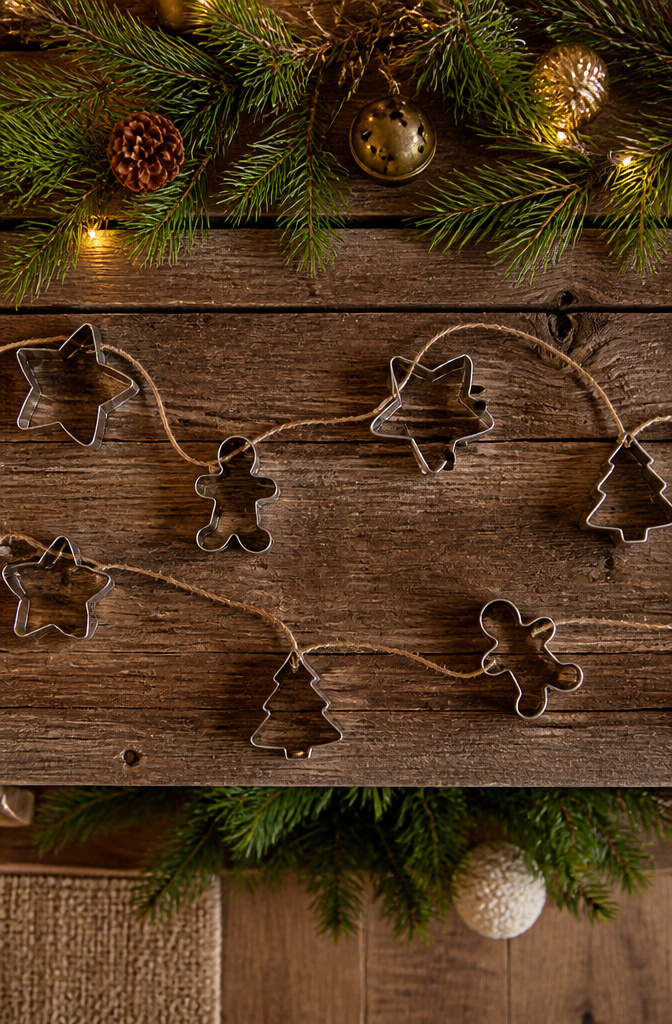
Metal cookie cutters strung in a row read as intentional only when the spacing stays tight and even. About two inches between cutters keeps the line from looking accidental, and a single long ribbon gives you that control better than twine alone. The sources describe two ways to thread them: short loops of baker’s twine tied to each handle, or the cutters hung direct from the ribbon if the handles cooperate. Twine loops are the safer bet; ribbon threaded through handles tends to slip and bunch, especially with the smaller shapes.
Weight adds up faster than you’d think. A dozen standard metal cutters on a single nail over a mantel will bend a thin brad or pull it from soft plaster. Two embroidery hoops and crossed twine, the way the mobile version builds it, spreads that load across a wider hook or a ceiling anchor. For a straight garland, a picture rail or a screw into stud wood beats trusting the trim.
18. String Dried Orange Garland

Dried orange garlands look expensive and take almost nothing but patience. The trick most instructions skip is slice thickness: one-eighth inch, no more. Thicker rounds hold moisture in the center and mold before they ever hang on a tree.
I set the oven to its lowest setting, usually 170°F or whatever yours bottoms out at, and prop the door open with a wooden spoon so steam escapes. Four to six hours is typical, though some batches need longer depending on humidity that day. The slices should feel like stiff leather, not bendy fruit leather, before they come out. They firm up more as they cool, so pulling them early is the common mistake.
Leave the peels on. They hold the slice together, add the color contrast that makes these charming, and release more of the citrus scent people notice when they walk in the room. Pith and all; do not bother with supreming or any fussy prep.
String them once they are fully room-temperature with a tapestry needle and kitchen twine, spacing each slice a hands-width apart so air can still move between them in storage. I have kept a strand usable for two seasons in a paper bag with a silica packet from a shoebox.
19. Make Pomanders
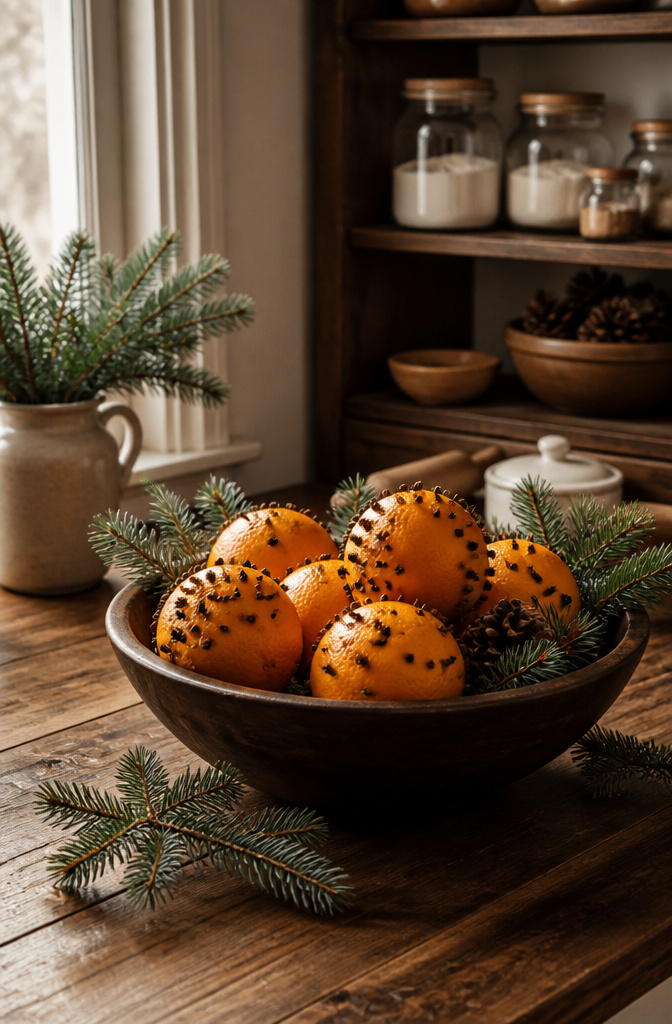
The pomander tradition runs wider than oranges, and the wider you run it the more interesting your kitchen smells for the week before Christmas. Apples, lemons, even firm pears take the treatment; the harder the fruit, the longer it holds shape without weeping. Whole cloves are non-negotiable, but the secondary spice is where you choose your own adventure. Cinnamon sticks split short and tucked between the cloves warm the scent toward bakery territory. Allspice berries keep it sharper, more medieval. Nutmeg grating over the finished surface is a quiet trick that adds depth without adding bulk.
The paper clip end, bent straight, makes the cleanest hole for cloves in thin-skinned citrus. A pin works for tougher rinds; the tool matters less than the pre-poking itself, which saves your thumbs and lets the cloves seat flush without splitting the flesh. Space them quarter-inch or tighter for coverage that lasts, looser for a scattered look that dries faster and looks more modern than you expect.
For hanging, ribbon crossed at the navel and pinned at the top is the classic route, though a loop of twine through a single clove hole does the job with less fuss. The whole-room scent builds over three days as the fruit dehydrates and the oils concentrate, stronger in a dry room than a humid one. A bowl of un-ribboned pomanders on the sideboard gives the same effect without the ceiling hook commitment, and the display reads as intentional rather than leftover.
20. Pine Cone Display
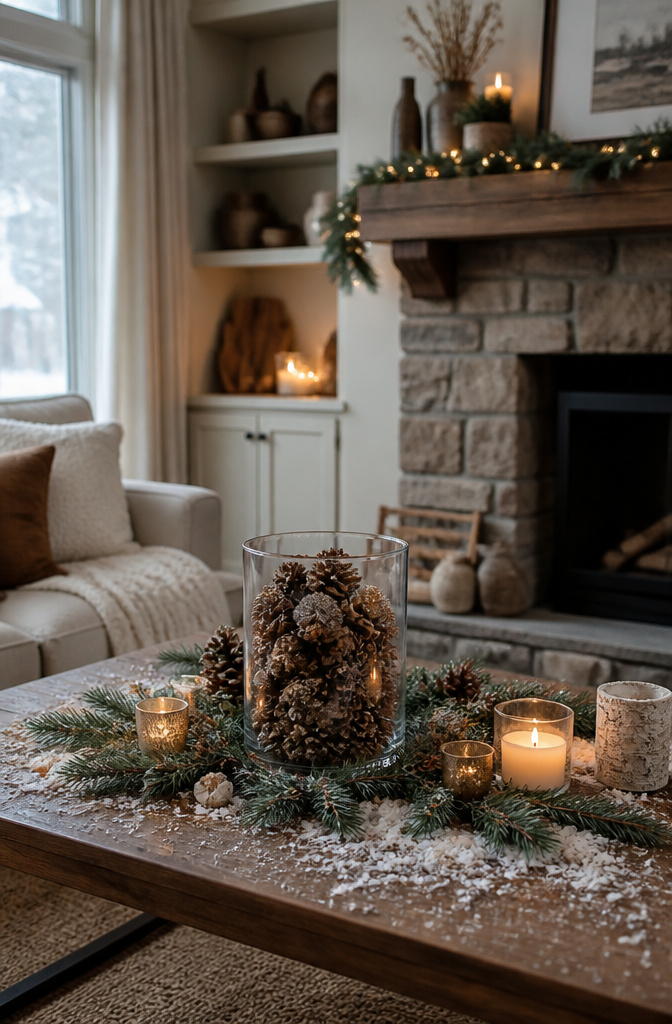
Pine cones are the one free material that still feels like a find, though half the ones in my bowl came from a craft store bag after a foraging trip went wrong. The ones I collected from a park near my sister’s house in late November looked perfect on the branch: closed, intact, no visible holes. What I did not check for was sap. Fresh cones left resin on the baking sheet that took two scrubbing sessions to lift, and the kitchen smelled like a campground for the rest of the afternoon.
Bake them at 400 degrees Fahrenheit for 30 minutes before you do anything else with them. The heat kills insects and opens the scales so they hold their shape. Store-bought cones have usually already been treated, so they skip this step, but foraged ones need it. After baking, the opened scales catch light better in a glass hurricane vase, especially paired with a strand of fairy lights. The same bowl of cones works for fall if you leave them plain, or you can dust the tips with white paint for a snow-covered look that carries through winter.
Frequently Asked Questions
How do you make a pomander?
Poke holes all over a whole orange with a pin or the bent end of a paper clip first, then push cloves into the holes. Wrap the fruit in orange ribbon if you want to hang it, tying a knot with a loop at the top. Let the finished pomanders sit in a dry spot with space between them until the skin hardens and no longer feels tacky; rushing this step traps moisture and causes mold.
What can I do with pine cones?
Bake them in the oven at 400 degrees Fahrenheit for 30 minutes, then display them in bowls or nestle them into a wreath. The baking cleans them and opens the scales so they look fuller.
How do you dry fruit for decorations?
The article does not cover this directly, but related guidance on drying fruit and preserving leaves for natural Christmas decor is available through linked resources on natural decoration techniques.