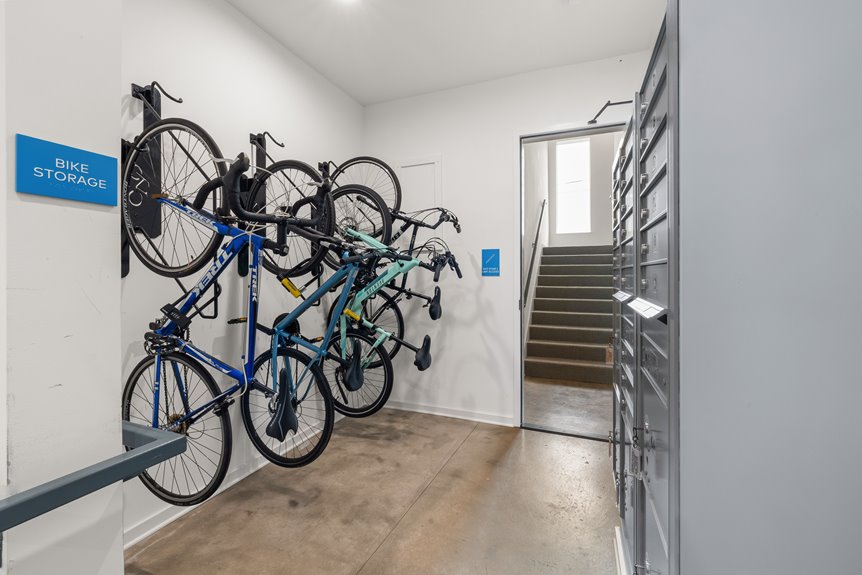
I store my bike vertically using a tension rod or wall-mounted rack to reclaim floor space in tight apartments. When drilling isn’t allowed, I choose freestanding lean racks or ceiling pulleys that hoist the bike overhead. I protect my floors with rubber mats beneath the tires and drip trays during maintenance. For daily access, I keep my bike at eye level on a horizontal wall mount, turning it into functional decor. Each method below breaks down exactly how to match your setup to your lease terms and square footage.
Check Your Lease: What Mounting Does Your Apartment Allow?
Where do you start when every square foot counts? Check your lease first, because losing your security deposit over a bike rack is a real financial consequence.
Losing your security deposit over a bike rack is a real financial consequence.
Read the Fine Print
Dig into your lease for mounting rules. Some apartments ban wall or ceiling drilling entirely. Others restrict exterior installations or common area hardware. Look for explicit prohibitions on hooks, racks, or stands.
Find Your Alternatives
If mounting is off-limits, explore what is allowed:
- Door-mounted solutions
- Freestanding stands
- Floor-to-ceiling tension devices
Cover Yourself
Note weight limits for any approved rack. Secure your bike properly to avoid damage claims. Get permitted methods and authorized contractors in writing before installing anything.
Pick Your Look: Display Your Bike or Tuck It Away
How do you want your bike to function in your space?
This decision shapes everything else. You can showcase your bike as decor or hide it completely.
Display Options
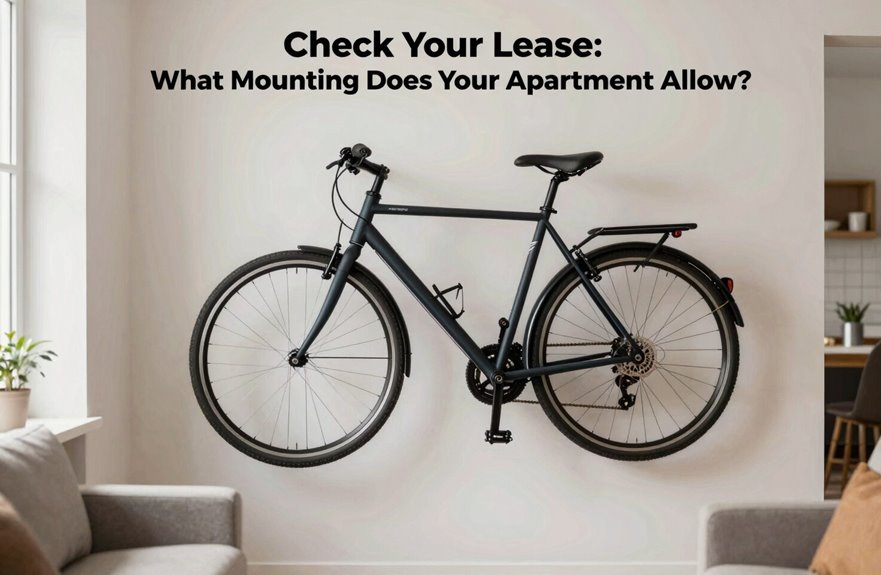
Wall-mounted racks transform your bike into visual art. Horizontal mounts position the bike parallel to the floor, creating a sleek profile. Vertical mounts lift one wheel higher, saving horizontal wall space. Both free up valuable floor area while keeping your ride accessible.
Concealment Options
Ceiling-mounted pulley systems hoist bikes overhead, removing them from sight entirely. This works well in tight quarters where wall space is scarce.
Hybrid Solutions
Bike-nook storage accommodates multiple bikes, including heavier models around 50 pounds, without clutter or tipping hazards. These systems balance accessibility with tidiness.
Choose based on your aesthetic preference and daily riding habits.
Use a Tension Rod When You Can’t Drill Walls
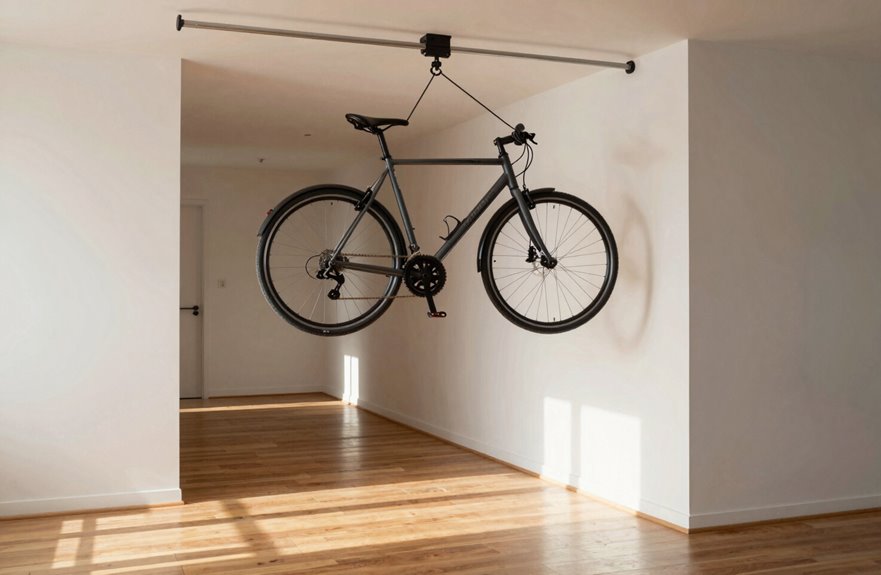
A tension rod offers a practical workaround when drilling into walls isn’t an option.
A tension rod offers a practical workaround when drilling into walls isn’t an option.
I use a floor-to-ceiling tension rod, like a Topeak-style device, when I need secure bike storage without permanent mounting. The rod applies vertical pressure between floor and ceiling, holding my bike upright without hooks or hardware. This method eliminates floor clutter while keeping my bike accessible.
For renters facing landlord restrictions, this approach protects your security deposit. I position the rod in a corner or unused vertical space, then anchor my bike to the integrated mount. The setup takes minutes and removes just as easily.
Quick access matters, so I place the rod near my door. However, I ensure the rod sits firmly against solid ceiling and floor surfaces to prevent wobble. A stable temporary storage system requires proper contact between the rod and both surfaces.
Check Weight Limits: Can Tension Rods Handle Your Bike?
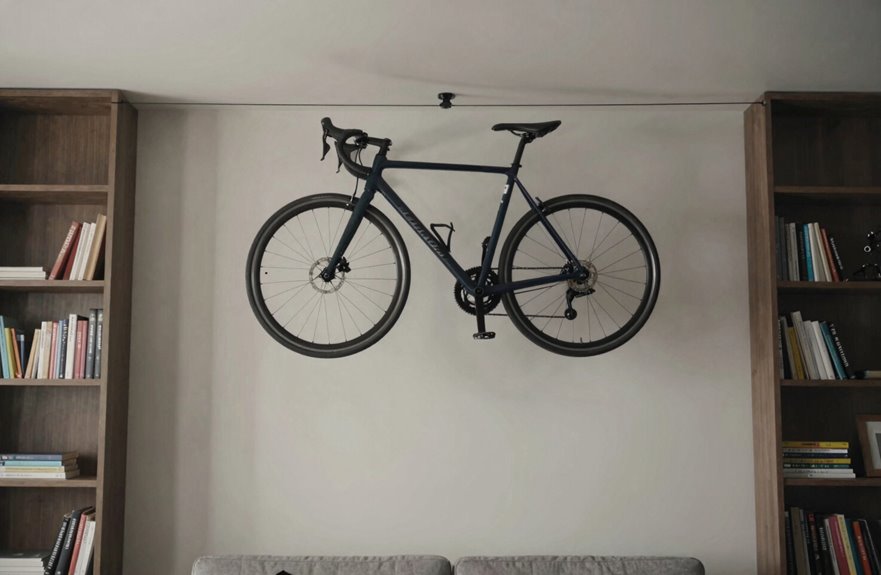
Tension-rod systems clamp between your floor and ceiling without touching walls, but they don’t suit every bike. Most handle standard road or mountain bikes fine, yet they struggle past 40–50 pounds where slippage becomes a real risk. Match your bike’s weight to the rod’s rating, and identify when you’ll need a sturdier alternative.
Weight Capacity Limits
Before installing any tension rod system, check the manufacturer’s weight rating to confirm it can handle your bike’s actual load. Weight capacity varies significantly between products, and an inadequate system risks damage to your bike, walls, and safety in tight living spaces.
- Topeak-type tension rod systems offer a non-wall, ceiling-free approach, but verify their specific limits first
- Heavy electric bikes pushing 50 pounds demand sturdier tension rod setups or alternative supports
- Bike nook-style freestanding options provide greater stability and lower falling risk for heavier bikes
Follow installation instructions precisely, since proper setup directly affects safe support. Skipping this verification step creates tangible risks: structural damage, bike damage, and potential injury from failure.
Tension Rod Strength
How much weight can your tension rod actually hold?
Tension rod strength varies significantly by model and mounting configuration. Most standard systems support 30–50 pounds, while industrial-grade options handle closer to 50 pounds per bike depending on rod diameter and anchorage quality.
Before installation, verify the maximum load rating for your specific model. Install secure end brackets with non-slip feet or end caps to prevent slipping and protect surfaces.
For heavier bikes like 50-pound electric townies, select rods rated for 50+ pounds. Distribute weight across two rods when possible, or add secondary support to reduce single-point stress.
Inspect your system regularly for wear, deformation, or loosening joints. Re-tighten or replace components promptly to maintain safe load-bearing capacity.
Wall-Mount Your Bike as Art in Small Apartments
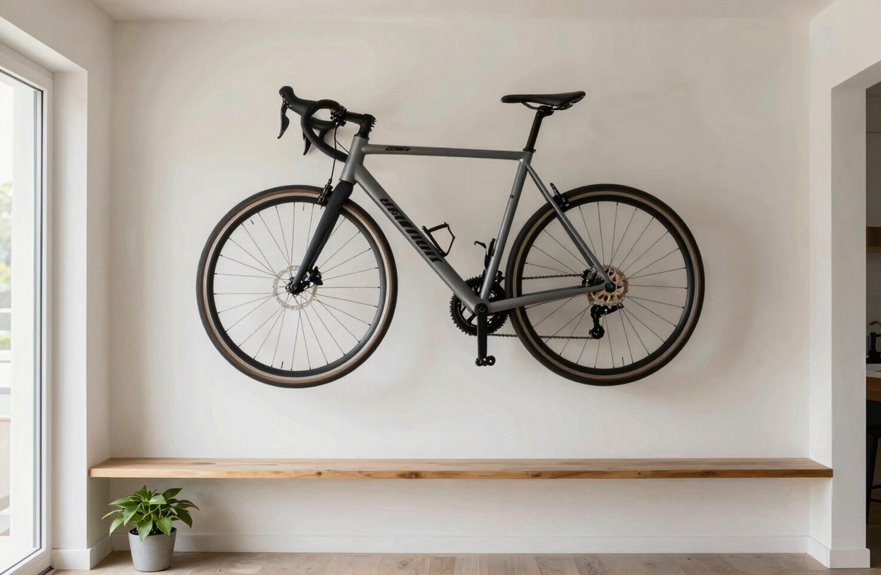
I mount my bike horizontally when I want the frame’s lines to echo my apartment’s aesthetic, or vertically when floor space is truly scarce. Shelf-rack combos let me store helmets and tools right beside the bike, turning storage into a functional display. Each option keeps my living area clear while making the bicycle a deliberate part of the room’s design.
Horizontal Rack Displays
Where floor space comes at a premium, wall-mounted horizontal racks offer a practical solution that transforms your bike into intentional decor. I mount my bike parallel to the wall, treating it as a focal point rather than clutter. A bike rack like the Leonardo Bike Rack Wall Mount with Tire Tray holds bikes up to 40 lbs and provides easy, space-efficient access. I position mine against patterned wallpaper with complementary furniture to create visual cohesion.
- Choose a wall that anchors your room’s layout, such as above a console table or beside a bookshelf
- Match your rack’s finish to existing hardware for seamless integration
- Add subtle lighting to highlight your bike’s frame as sculptural art
This approach serves as minimalist or industrial decor, reducing visual clutter while keeping your bike accessible and ready to use.
Vertical Hanging Solutions
While horizontal mounting keeps your bike accessible at shoulder height, vertical hanging solutions exploit your wall’s full height to reclaim even more floor space.
Wall-Mounted Bike Racks
Wall-mounted bike racks like the Leonardo Bike Rack Wall Mount with Tire Tray support bikes up to 40 pounds. These systems eliminate floor contact entirely, preventing scuff marks while positioning your bike as architectural art.
Ceiling and Pulley Options
For high ceilings or entryways, pulley systems such as the RAD Cycle HWD630542 enable smooth raising and lowering without ladder access. Install them above compact storage, such as vintage lockers, to achieve a casual, integrated aesthetic.
Multi-Bike Considerations
Vertical arrangements accommodate multiple bikes in tight quarters. Arranging bikes in staggered formation creates visual order that signals intentional design rather than clutter. This approach transforms necessary storage into deliberate décor.
Shelf-Rack Combos
Shelf-rack combos transform your bike storage into a functional display system. Mounting your bike on the wall gains instant surface space for keys, plants, or books. These shelf-rack combos merge art with utility, turning tight apartments into organized, intentional spaces.
Consider these practical options:
- Horizontal mounts with integrated shelves hold gear above your frame
- Vertical systems stack storage tiers alongside suspended wheels
- Minimalist designs pair clean lines with hidden hardware
Selecting shelf-rack combos that match existing decor creates visual cohesion without clutter. The Leonardo rack supports forty pounds while its tray keeps floors clean. Modern, uncluttered styles transform your bike into a sculptural element. This approach maximizes square footage while maintaining personal aesthetic standards.
Reclaim Ceiling Space With Pulley Bike Storage
Why let valuable ceiling space sit empty when it could hold your bike instead? A ceiling-mounted pulley system reclaims that forgotten real estate.
| Feature | Benefit | Best For |
|---|---|---|
| Pulley mechanism | Easy raise/lower motion | Daily riders |
| Heavy-duty construction | Secure holding up to 50 lbs | Road and mountain bikes |
| Overhead placement | Zero floor footprint | Studios and micro-apartments |
| Adjustable height | Custom clearance control | Low or angled ceilings |
| Near-door installation | Quick grab-and-go access | Entryway storage needs |
The RAD Cycle Black 1-Bike Ceiling Mount keeps a bike suspended above your living area. Tiny-house dwellers adopted this approach first, proving it works when wall storage isn’t available. You maintain visual order, reduce clutter, and keep your bike accessible while out of sight.
Choose a Free-Standing Rack If Floor Space Allows
I prefer free-standing racks when I can’t drill into walls or ceilings, since they let me store my bike without violating lease agreements or damaging surfaces. I can move these racks around my apartment as needed, and I always check that the base supports my bike’s weight before committing to a specific model. When floor space is available, this option keeps my walls clear while still organizing my bike in a stable, accessible spot.
No-Drill Required Setup
Where floor space permits, a free-standing rack offers the simplest no-drill solution for bike storage. Choose a freestanding bike rack that fits your specific layout without demanding permanent installation.
- Select vertical or lean-style designs that hold 1–2 bikes within a tight footprint
- Verify stability features and anti-tip construction, especially for bikes nearing 50 lbs
- Consider multi-use units that function as room furniture to blend with your decor
Confirm the rack folds or moves easily when reconfiguring for guests. This approach keeps your walls intact while providing secure bike storage. A freestanding rack respects both your space constraints and your lease agreement, eliminating the need for wall damage or permanent modifications.
Portable And Adjustable
A free-standing rack gives you flexibility that wall-mounted systems can’t match. This solution works well when you have a corner or strip of floor to dedicate to your bike.
Why Choose a Free-Standing Rack
- No drilling required, so you protect your security deposit
- Reposition easily when you rearrange furniture
- Choose from sleek metal designs or budget-friendly options
Making It Work in Tight Spaces
Position a free-standing rack near your entryway, pairing it with a small shelf for keys and gloves. This creates a compact gear station without scattered clutter. When friends visit, you can simply roll the entire unit into your bedroom.
Multi-Bike Solutions
Many free-standing rack models hold two or three bikes vertically. You can stack one bike above another to reclaim significant floor area.
Select a base with adjustable feet for uneven apartment floors.
Weight Capacity Matters
How much weight can your storage solution actually handle? Weight capacity isn’t just a number on a box. It’s the critical factor that keeps your bike safe and your floors intact.
When floor space allows, I recommend choosing a free-standing rack. These units sit away from walls, so you avoid drilling entirely. Before buying, check these specifications:
- Select a model rated for 40–50 lbs per bike, especially if you own a heavy electric townie
- Verify total rack weight capacity covers your bikes plus any panniers or accessories
- Pick a unit with a broad base or weighted design to prevent tipping during daily use
Free-standing racks provide portable, movable storage that reduces clutter while keeping everything accessible. When you match the specs to your actual needs, you eliminate wobble, damage, and equipment failure.
Stack Two Bikes Vertically to Save Space
If you’re working with limited square footage, stacking two bikes vertically is one of the most efficient ways to reclaim your floor. Tension-based systems like the Velo Column work exceptionally well for this purpose, adjusting from seven to ten feet to accommodate various ceiling heights.
Vertical Bike Storage Options
- Tension rod systems – These require no drilling and hold two bikes securely using floor-to-ceiling pressure.
- Pulley setups – Ceiling-mounted alternatives lift bikes overhead without touching walls, ideal for strict lease agreements.
Vertical positioning eliminates ground clutter, creating usable space beneath for gear or daily activities. When selecting hardware, verify load ratings; each support must handle approximately 50 pounds. This ensures stability when doubling your capacity in minimal square footage.
Lean Your Bike Stylishly: Renter-Friendly Storage
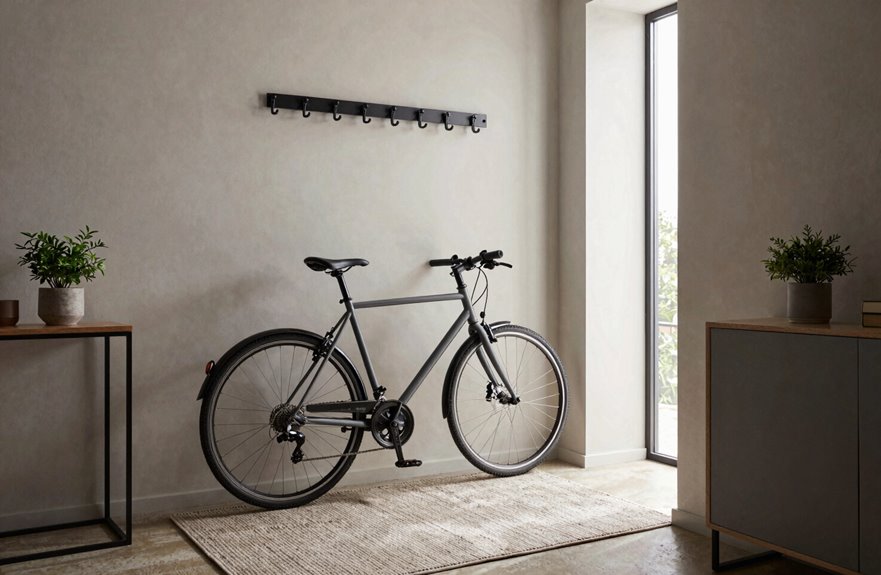
Where can you park your bike without drilling holes or sacrificing style? Leaning bike storage offers the perfect middle ground for renters who want function without permanent changes.
This approach lets your bike rest against walls or furniture, freeing floor space while keeping everything accessible. You don’t need tools or landlord permission, and you can move things whenever you want.
To make it work in your space:
- Position bikes in entryways or niches to maintain traffic flow while keeping them visible
- Pair your bike with decorative backdrops or patterned rugs so it blends into the room
- Use compact storage furniture to hold multiple bikes without visual clutter
A stable, low-risk setup protects your walls and your security deposit.
Hide Your Bike Behind a Door or in a Closet
Leaning your bike against a wall works well, but sometimes you want it completely out of view.
Use Door Mounts for Concealed Storage
Door mounts offer a practical solution when wall mounting isn’t possible. Install these on rarely used doors, such as closet or bedroom entrances you don’t need daily, to keep your bike hidden without sacrificing floor space.
Select the Right Location
Choose doors that open infrequently. This prevents your bike from blocking everyday access while maintaining concealment. The mount supports your bike’s weight securely behind the door and eliminates visible clutter.
Ensure Proper Installation
Before mounting, verify the setup handles your bike’s size and weight. Check stability regularly to prevent tipping or damage. This approach conserves valuable apartment space while keeping your bike accessible yet invisible.
Take It Outside: Weatherproof Tent Storage for Courtyards
Sometimes indoor space simply isn’t available. When your landlord restricts wall mounts or your closet barely fits your shoes, a bike tent offers a practical courtyard solution. These weatherproof shelters protect your ride from rain, UV damage, and dust without demanding precious square footage inside.
Bike tents work especially well for renters facing strict building policies. They’re portable, accommodate multiple bikes depending on size, and keep your living area completely uncluttered.
- Choose a model with ventilation panels to prevent moisture buildup and rust
- Anchor the tent securely to withstand wind gusts and storms
- Position it near your entrance for quick access during commutes
With proper setup, you’ll reclaim your apartment while maintaining bike security and accessibility.
Protect Your Floors: Quick Covers for Grease and Dirt
Since I’ve brought my bike inside, protecting my floors is essential.
Bringing my bike indoors meant one thing: protecting my floors became non-negotiable.
Floor Protection Basics
I place washable floor mats or heavy-duty rubber under my bike. These catch grease drips and prevent oil stains on hardwood or tile.
Strategic Placement
I use a removable, non-slip bike stand with a built-in drip tray. This channels dirt away from surfaces during maintenance. For extra security, I install vinyl protective strips where tires rest. These prevent scuffs without permanent installation.
Easy-Clean Solutions
I prefer interlocking anti-fatigue mats. They’re low-profile, removable, and cleanable without floor damage.
Maintenance Habits
I wipe my drivetrain regularly and place drip pans or towels underneath during repairs. This minimizes dirt transfer and preserves my deposit.
Floor protection keeps my space functional and maintains landlord relations.